
Azure Blob
Weekerp の画像・動画 CDN を利用するために、Azure Blob Storage に接続する方法を説明します。
Weekerp API を利用するために、Azure のストレージに接続する方法を説明します。
認証情報を発行し、発行した認証情報を Weekerp に登録するまでの全手順を含みます。
接続に必要な情報
Weekerp が画像にアクセスできるように、次の情報を入力する必要があります。
- account key
- account name
- container name
認証情報の取得(Azure)
- Azure 管理コンソールにアクセス → Storage accounts → Create(Storage account を作成)
- 作成した Storage account を選択 → Security + networking → Access keys → key1 → Copy(Account Key)
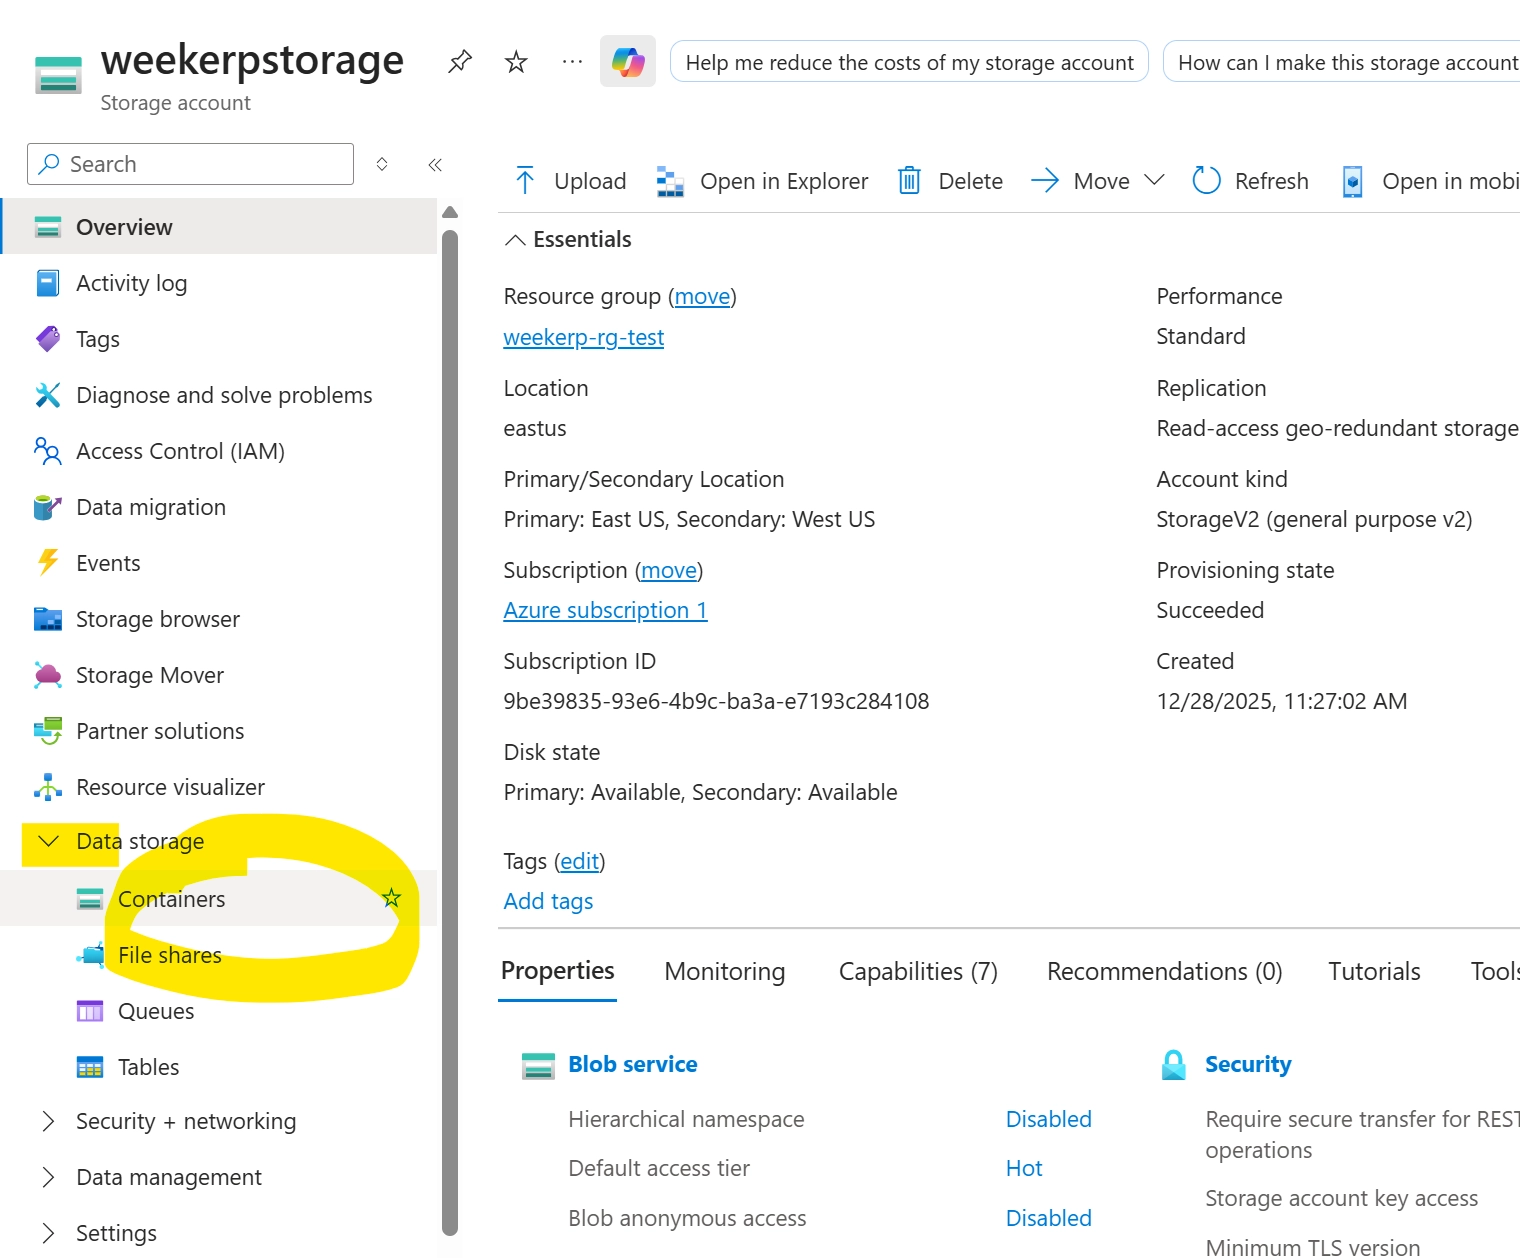
- 作成した Storage account を選択 → Data storage → Containers → Add container → Create(Container Name)
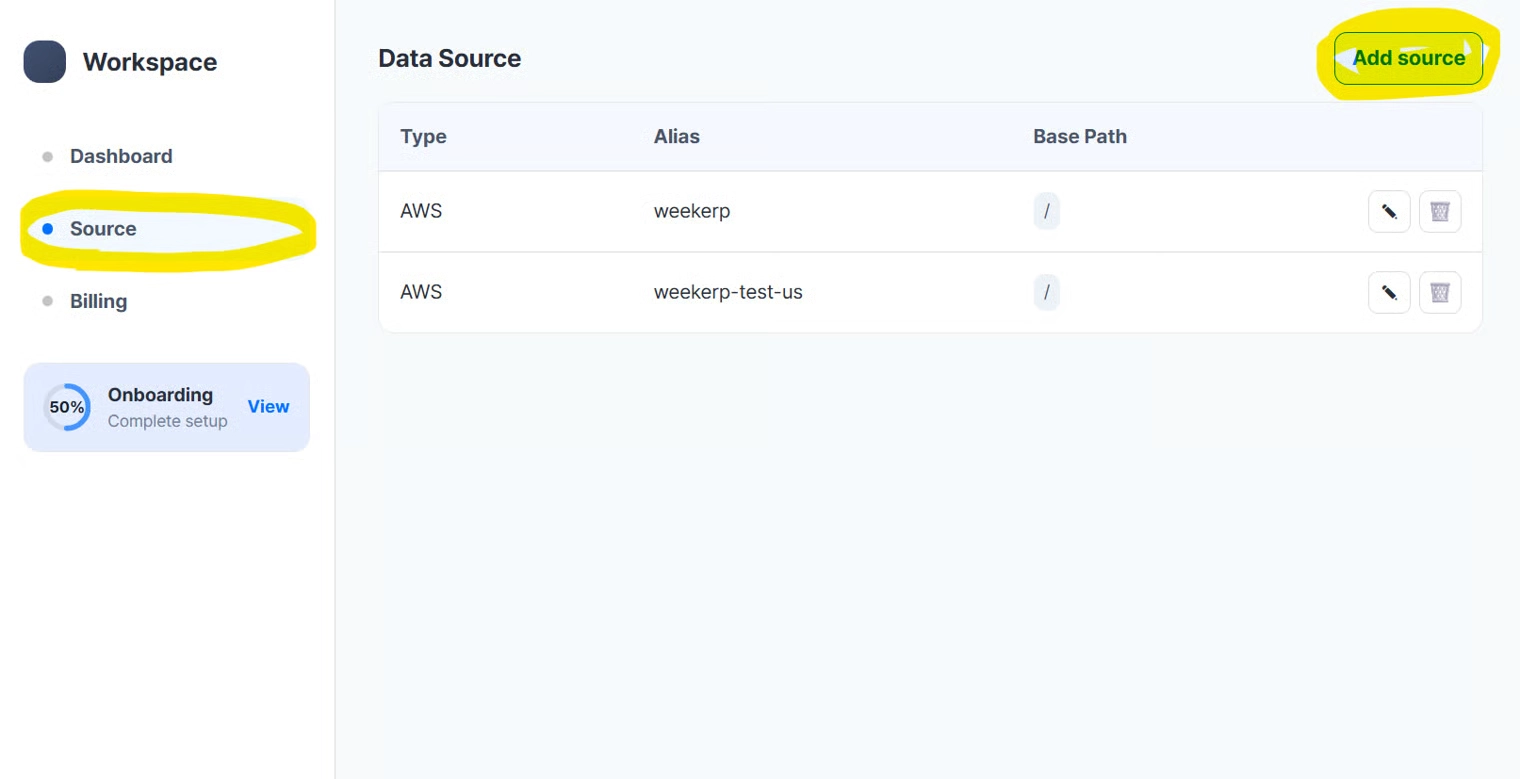
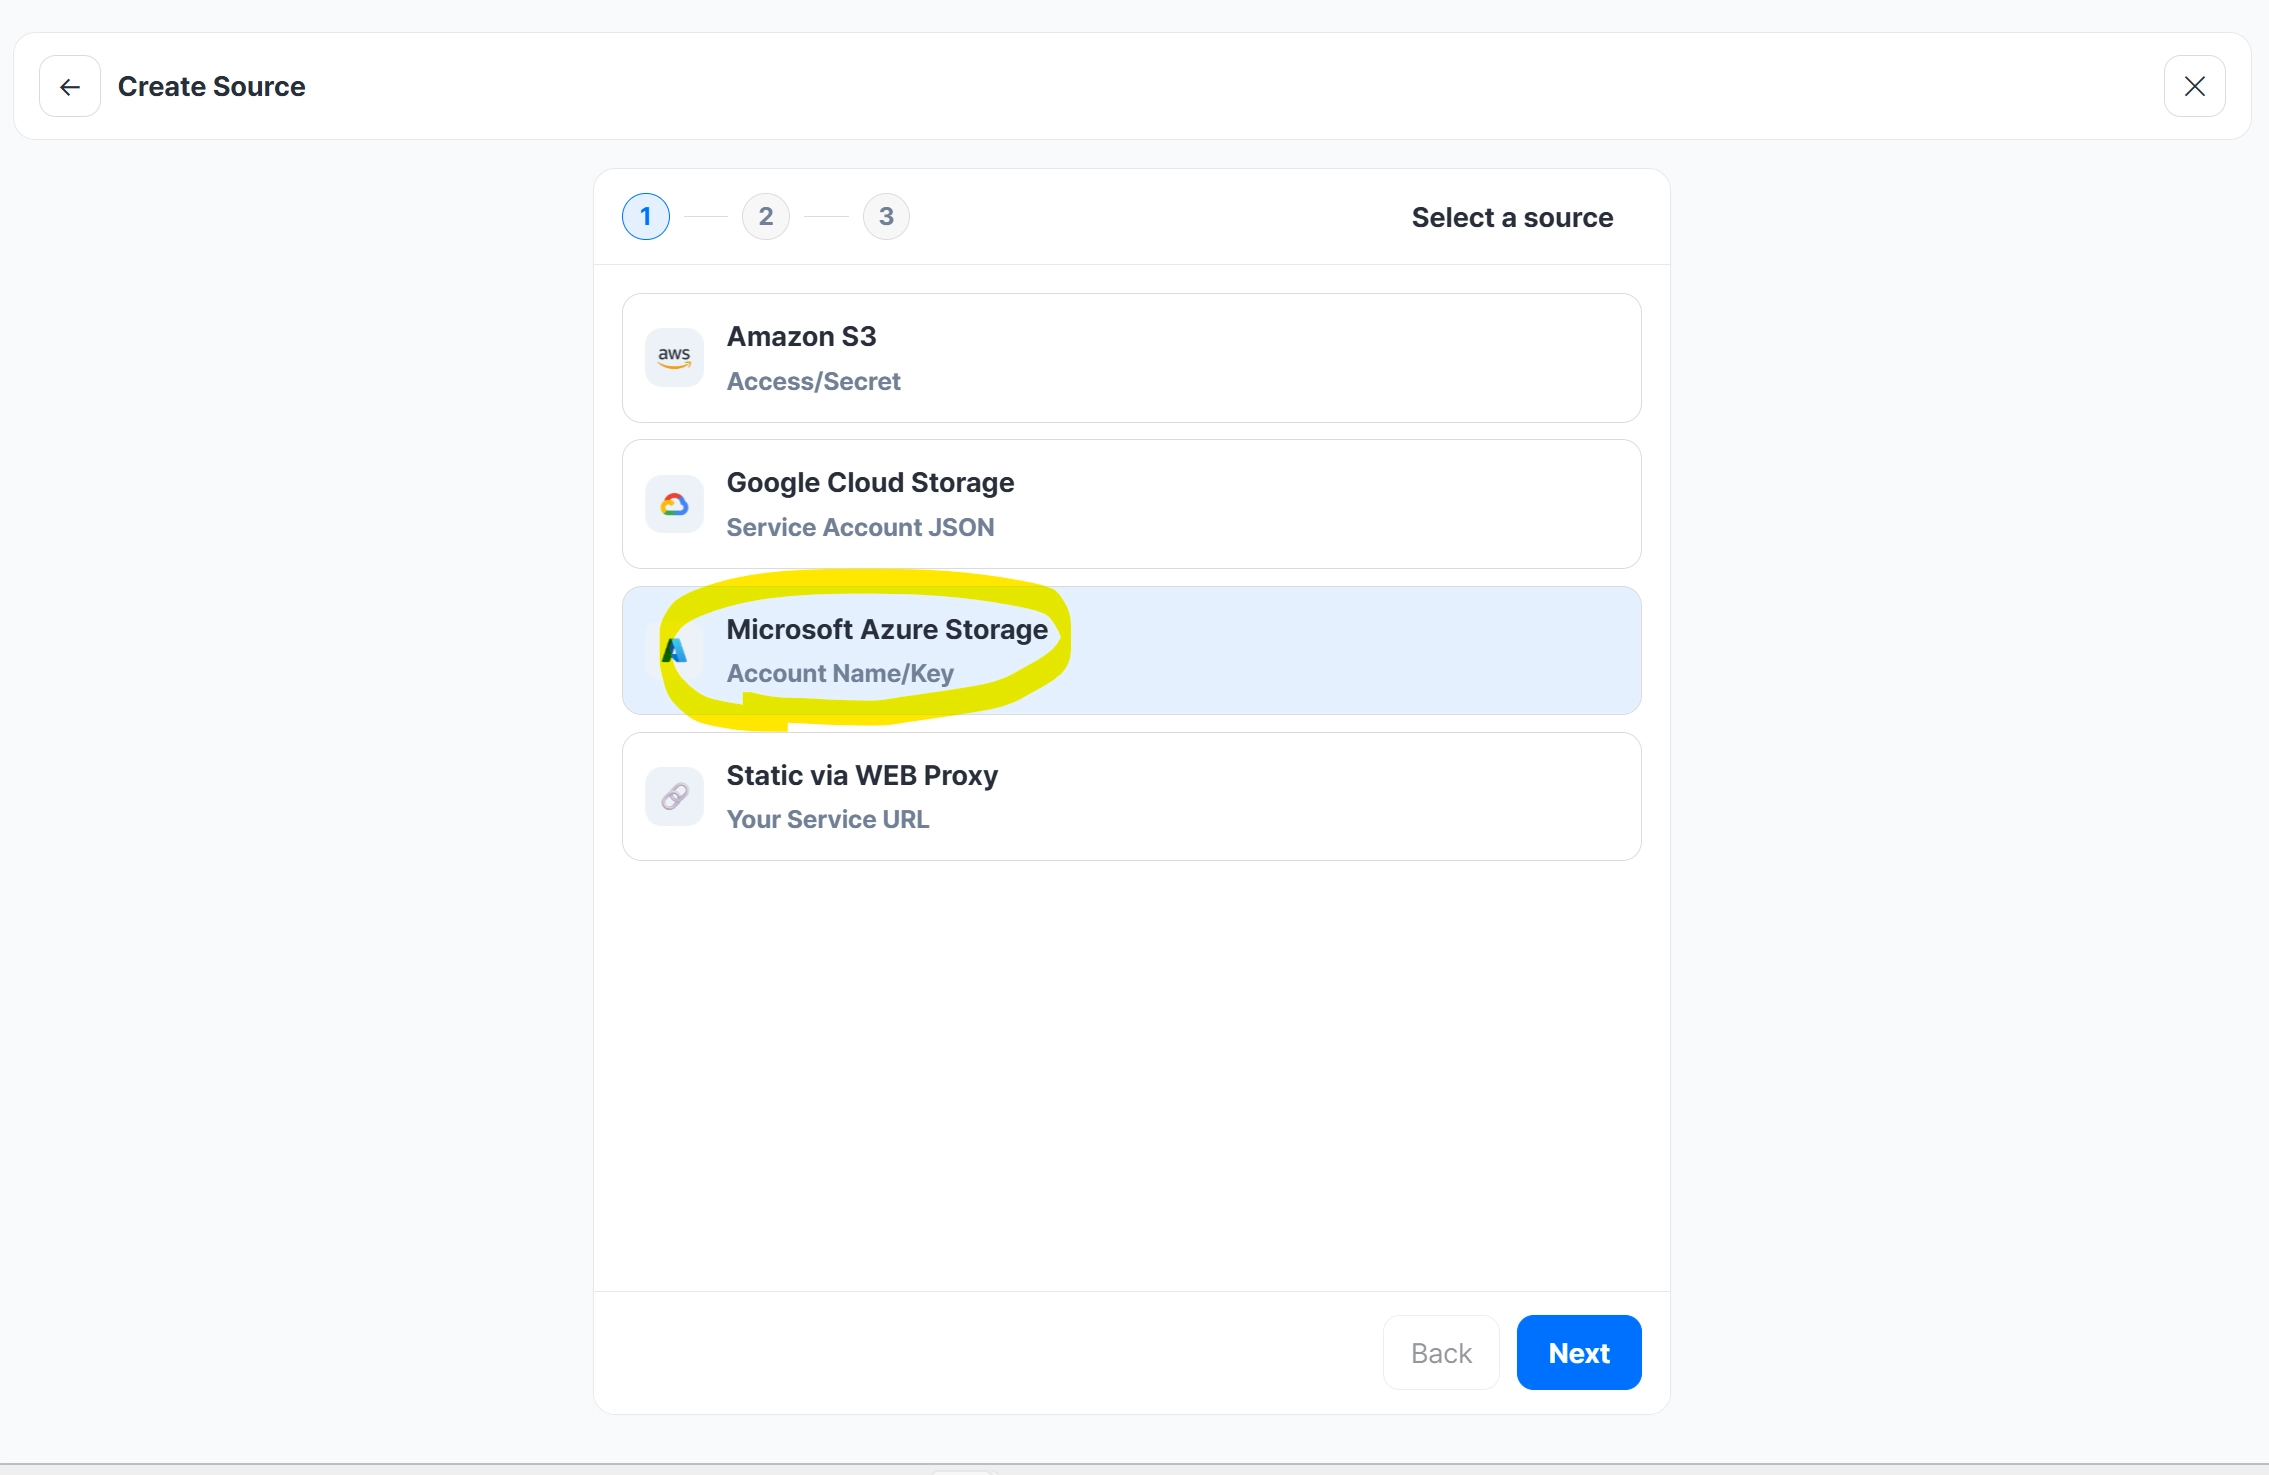
- Weekerp にアクセス → Sources → Add Source → Microsoft Azure Storage
- Weekerp に Account Name / Account Key / Container Name を入力 → Next → エイリアスを入力して作成
以下は画像で示したガイドです。
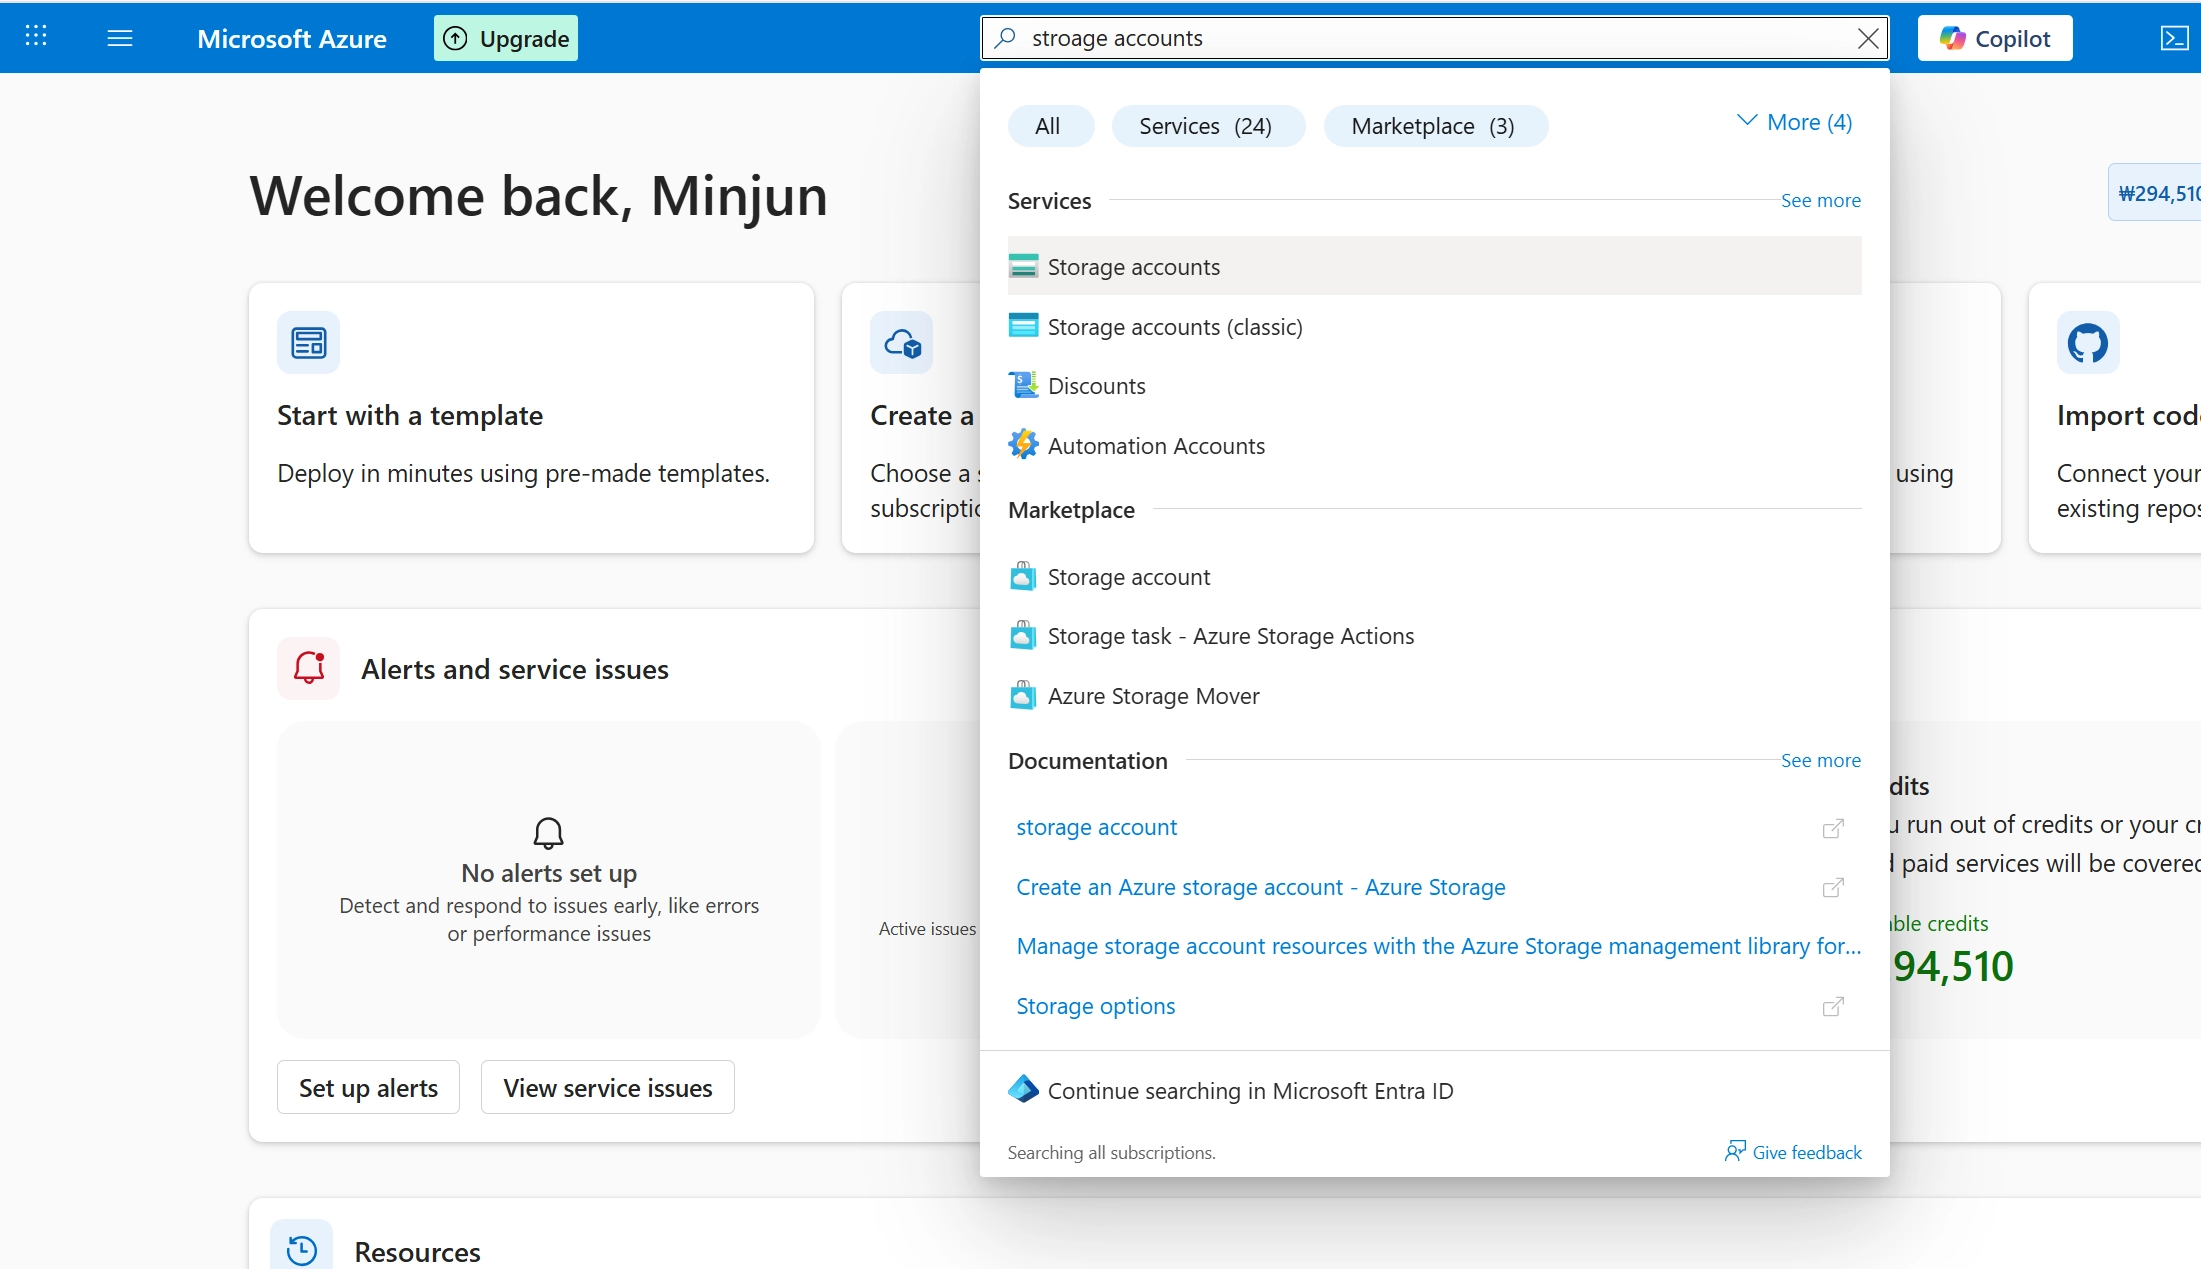
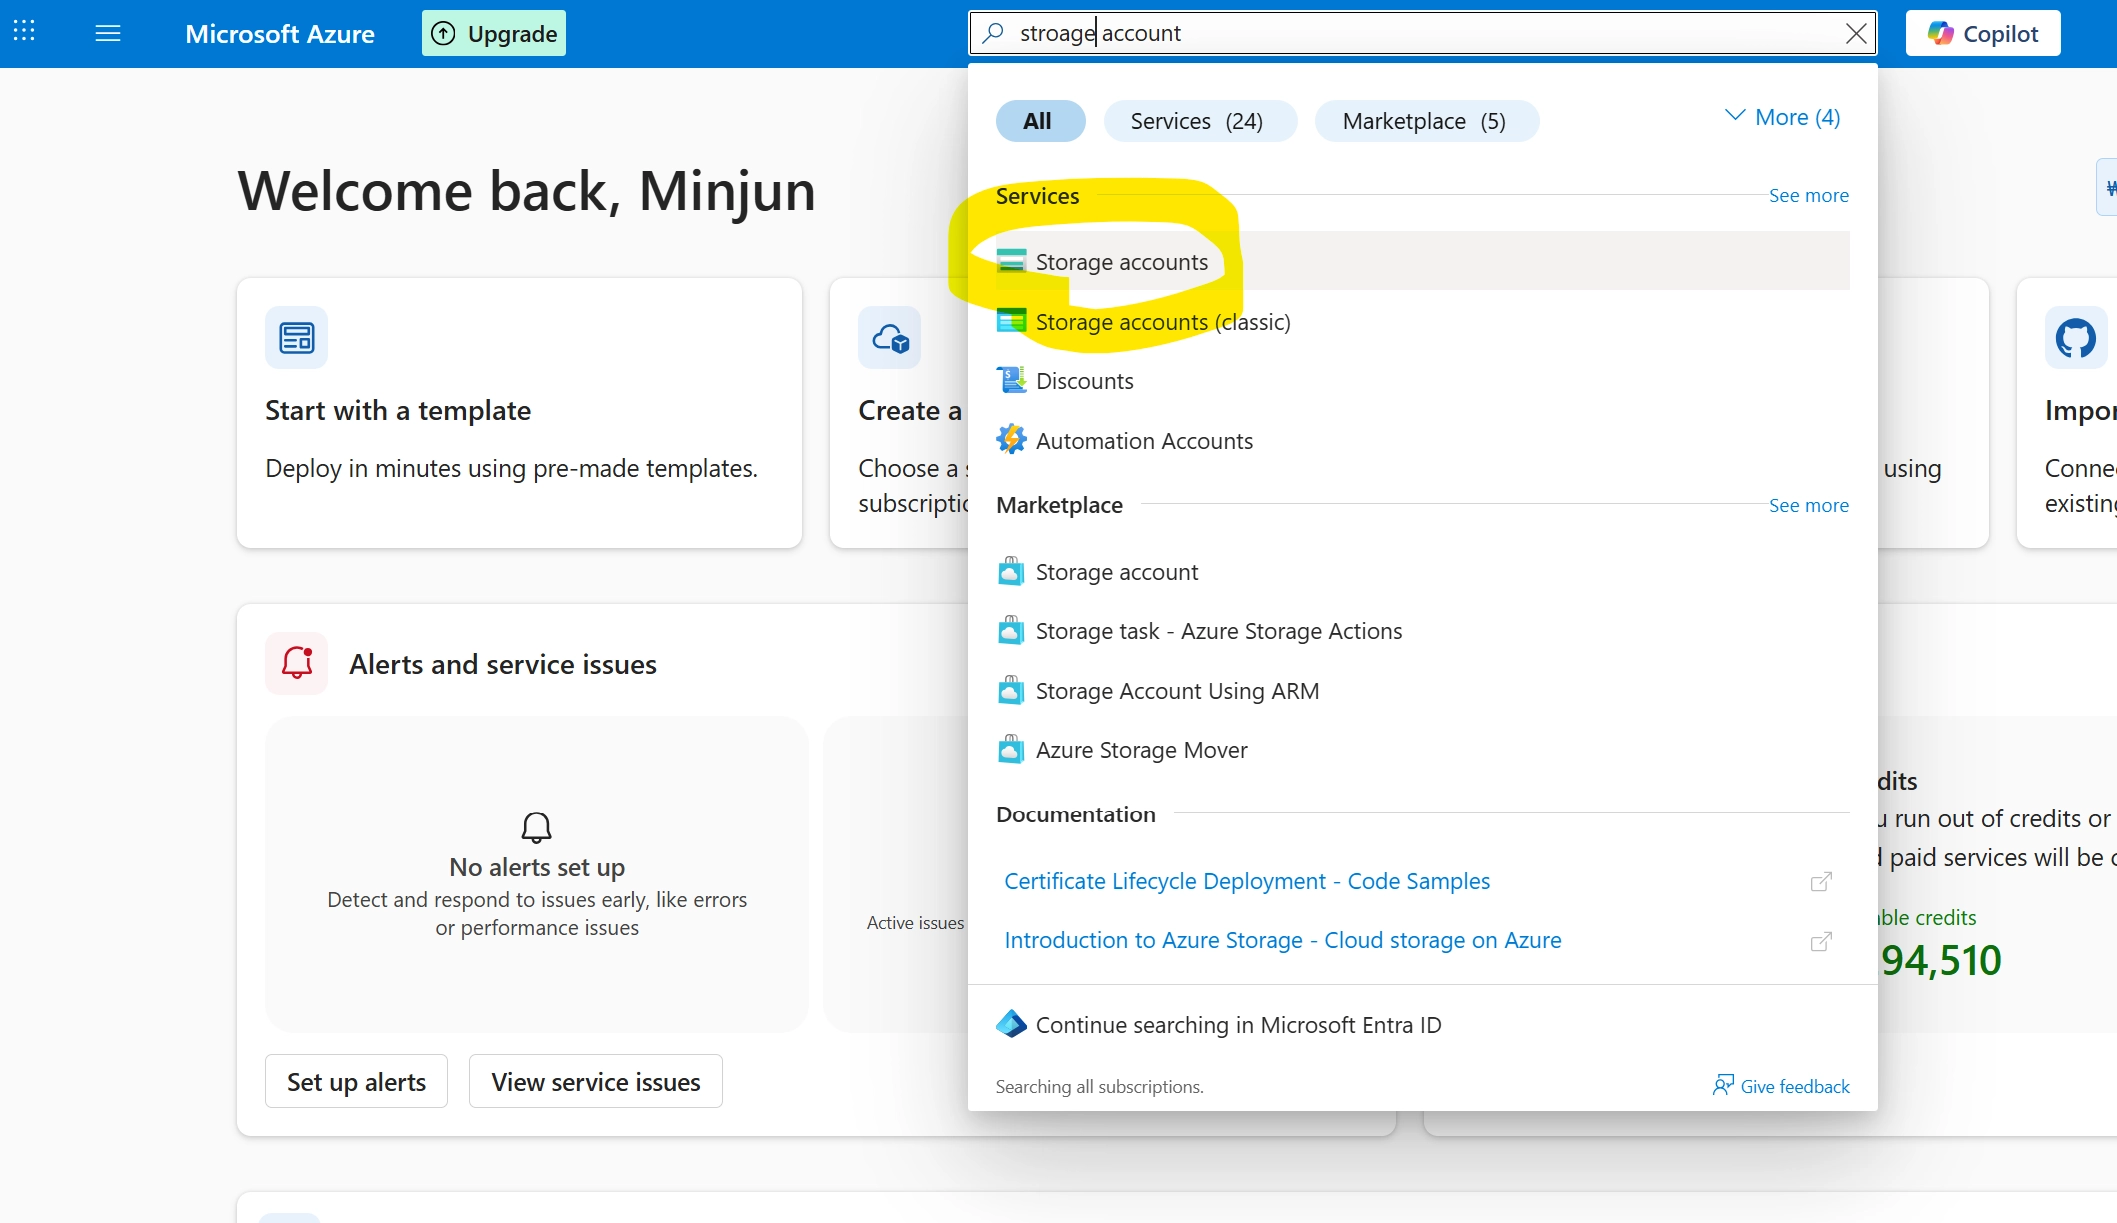
1. Azure 管理コンソールで「Storage accounts」を検索
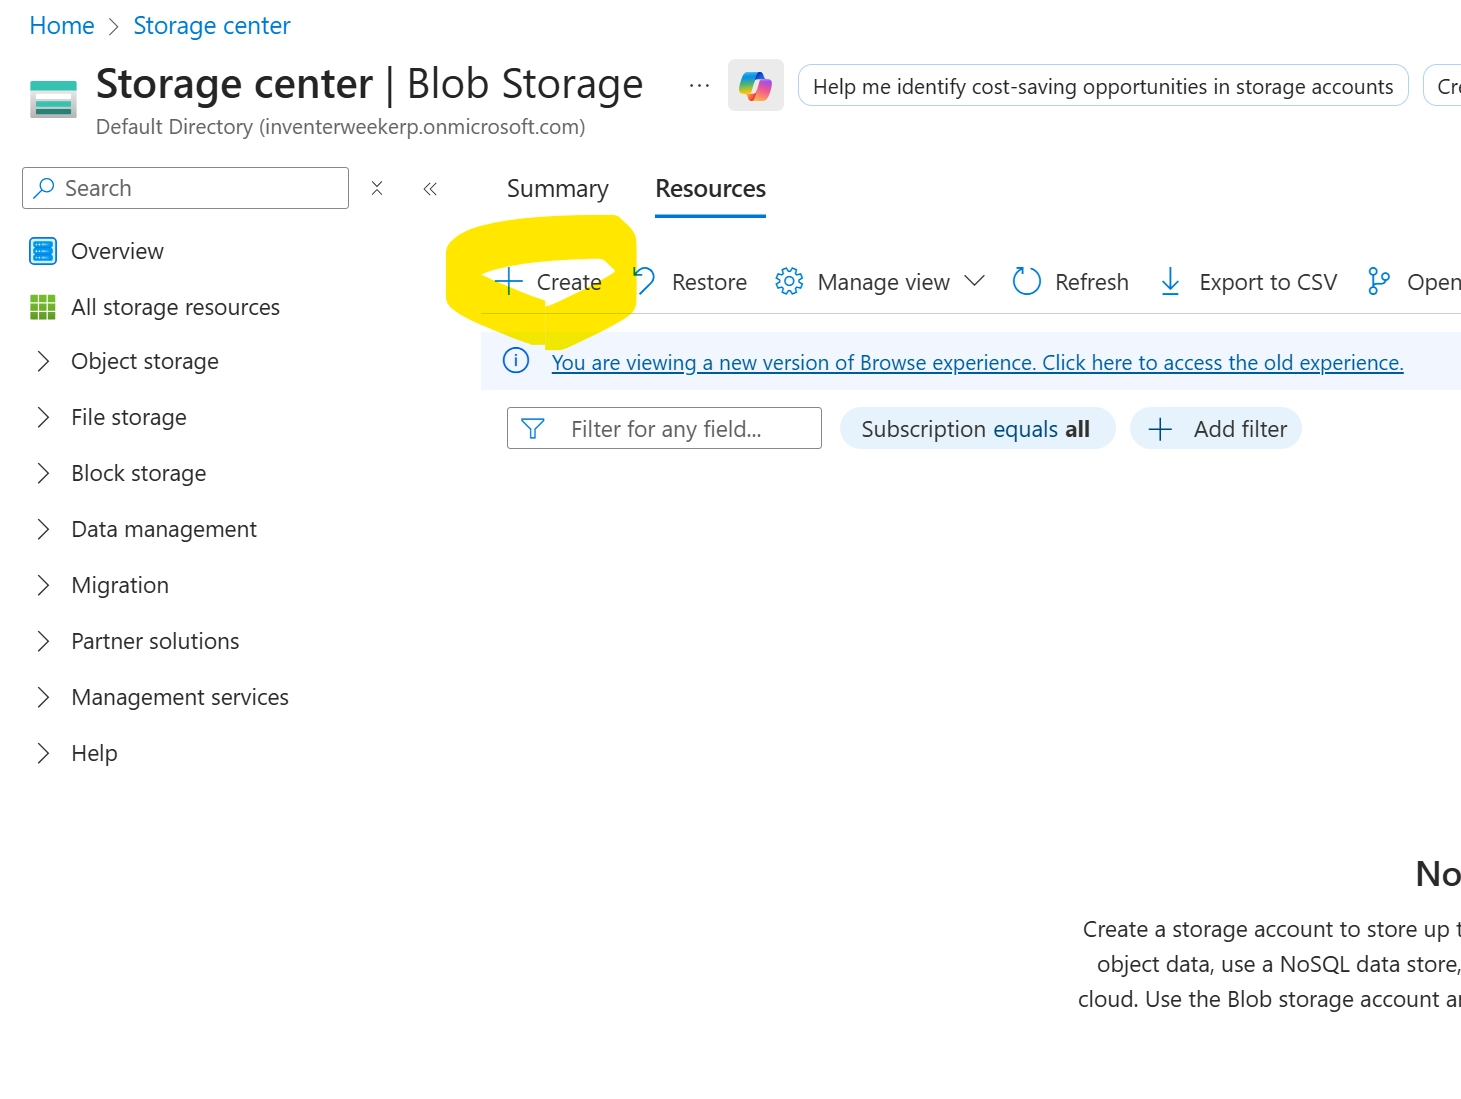
2. 「Create」をクリック
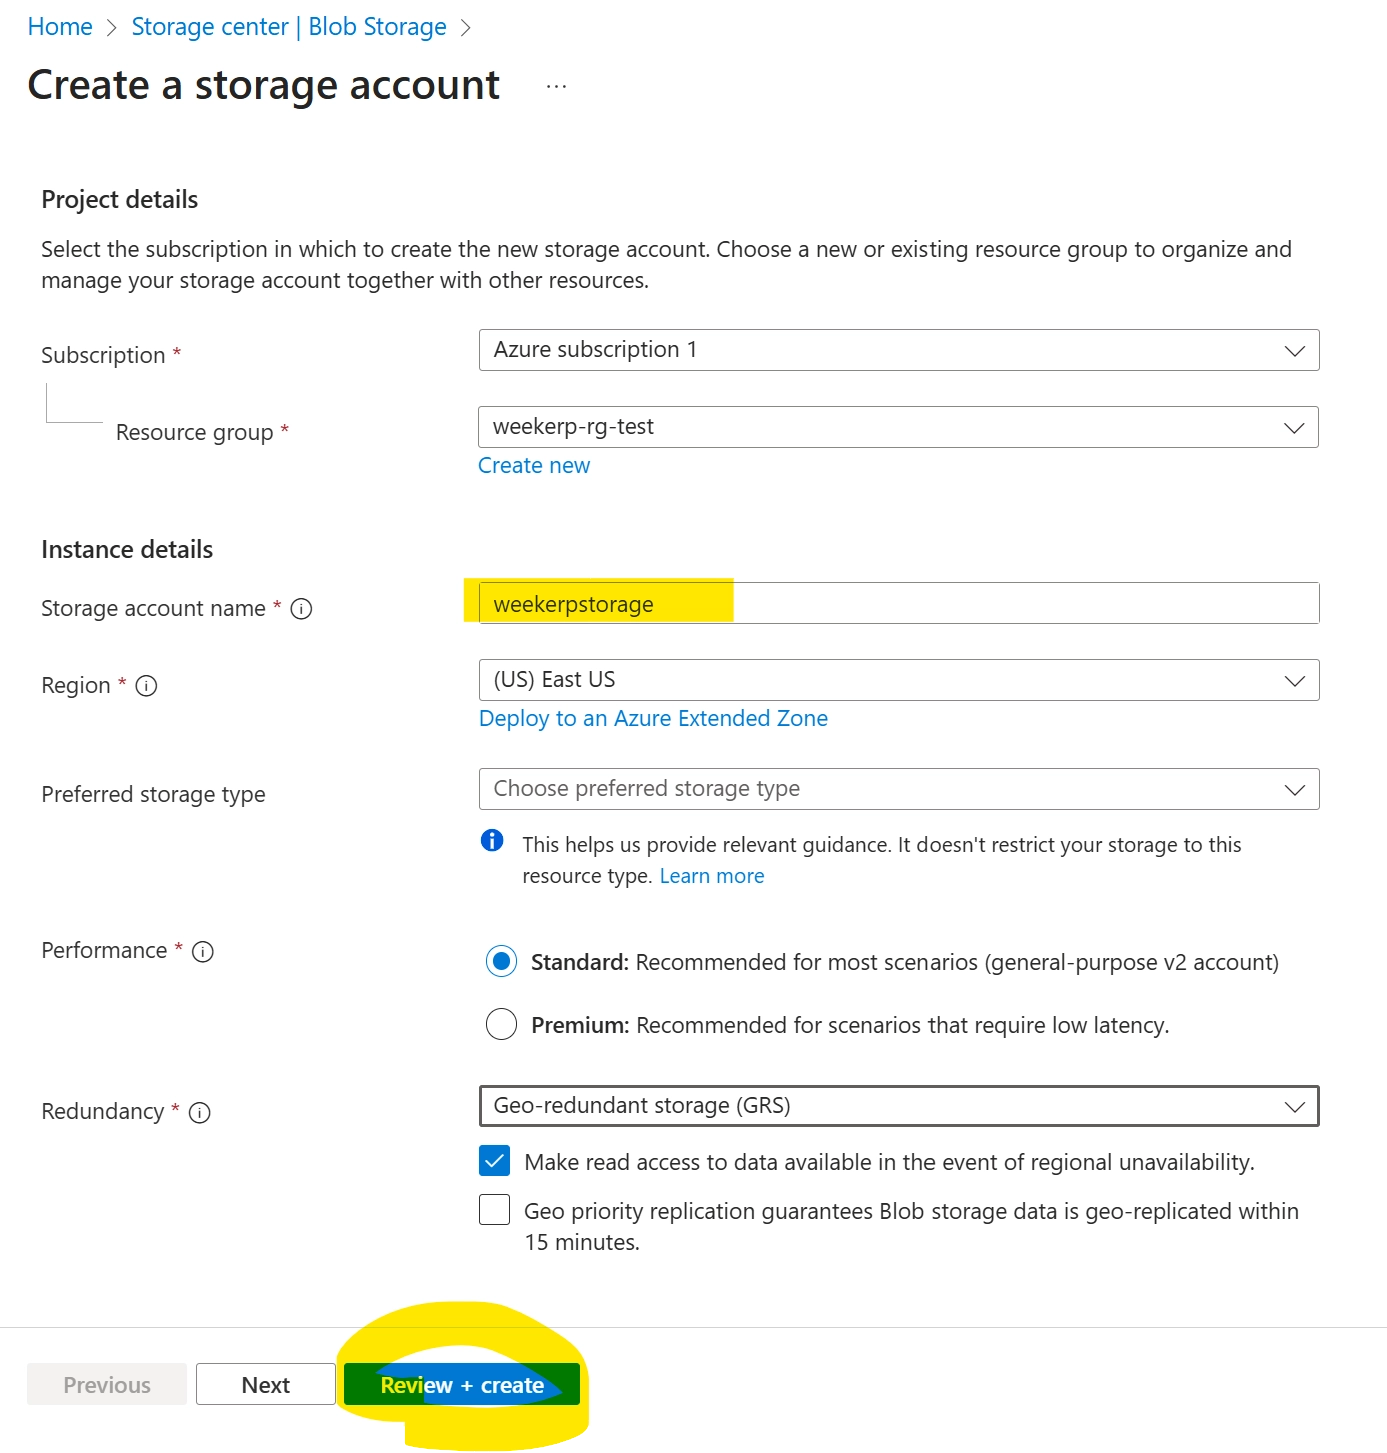
3. Storage account の作成
- account name を入力
- 下部の Review + create をクリック
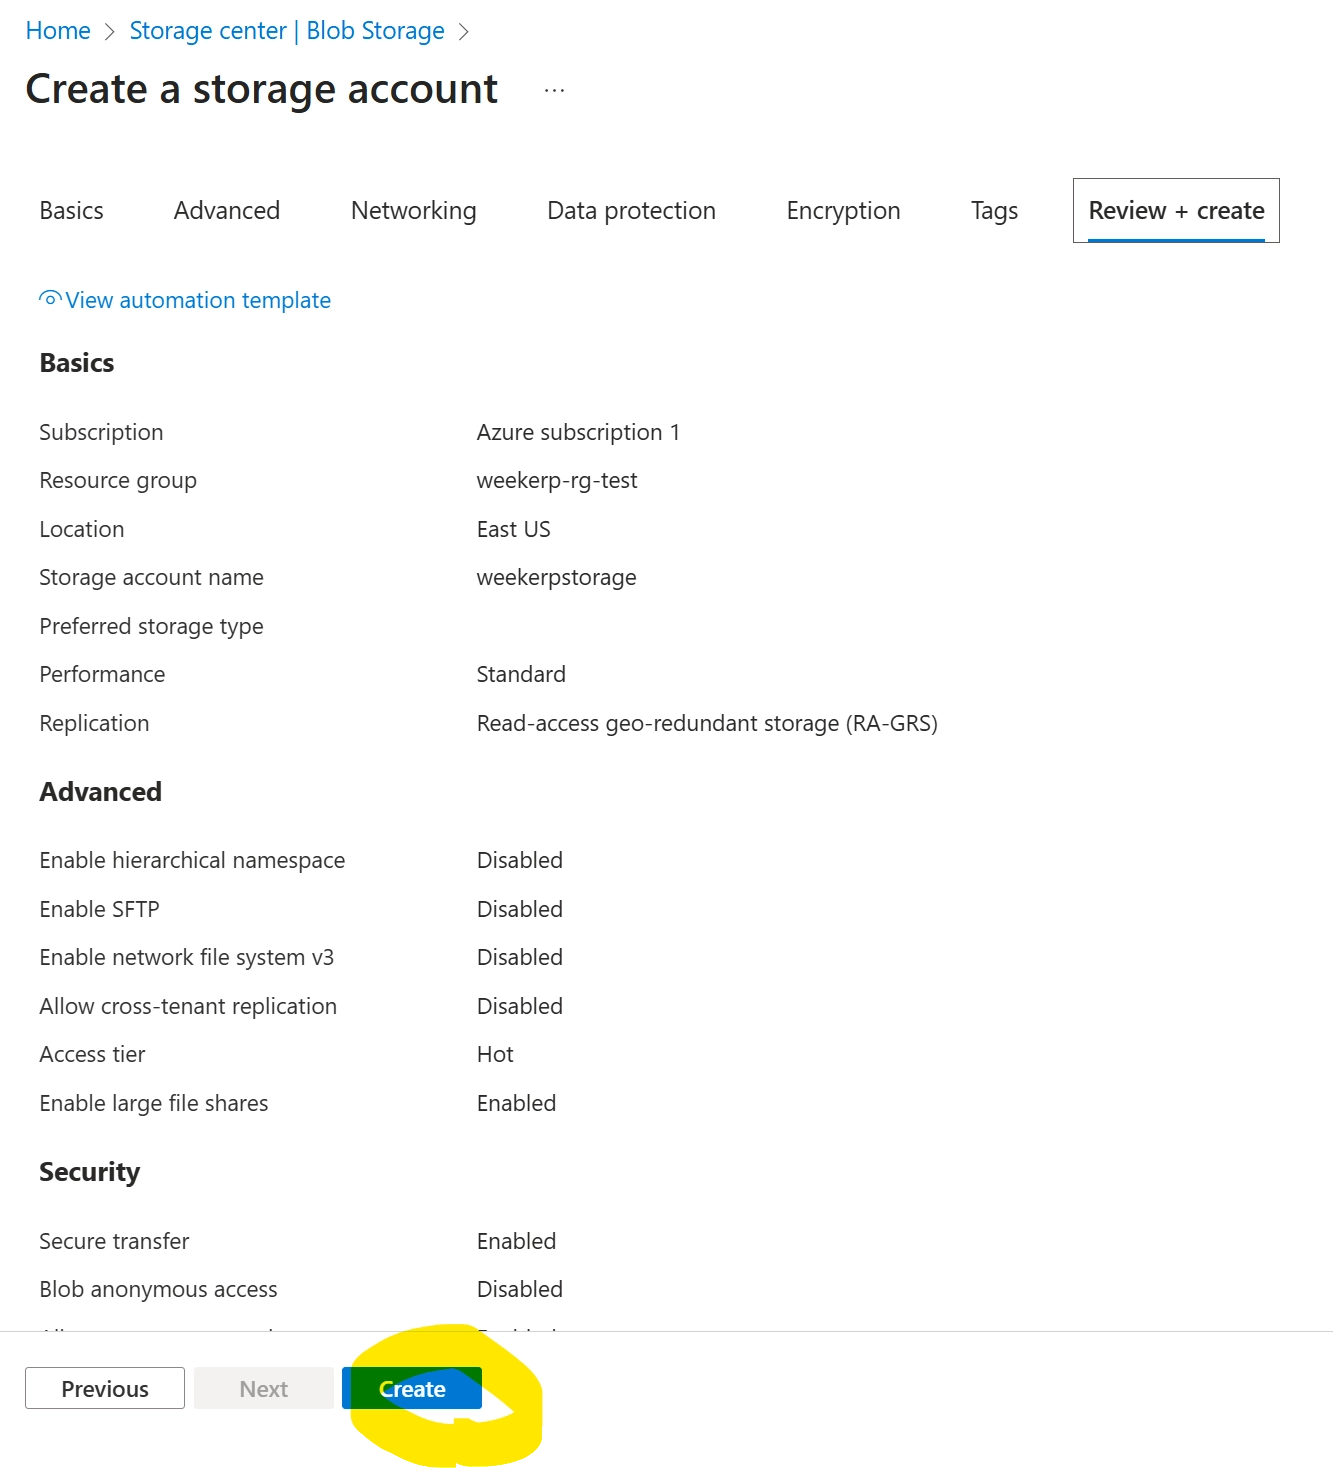
4. 下部の Create をクリック
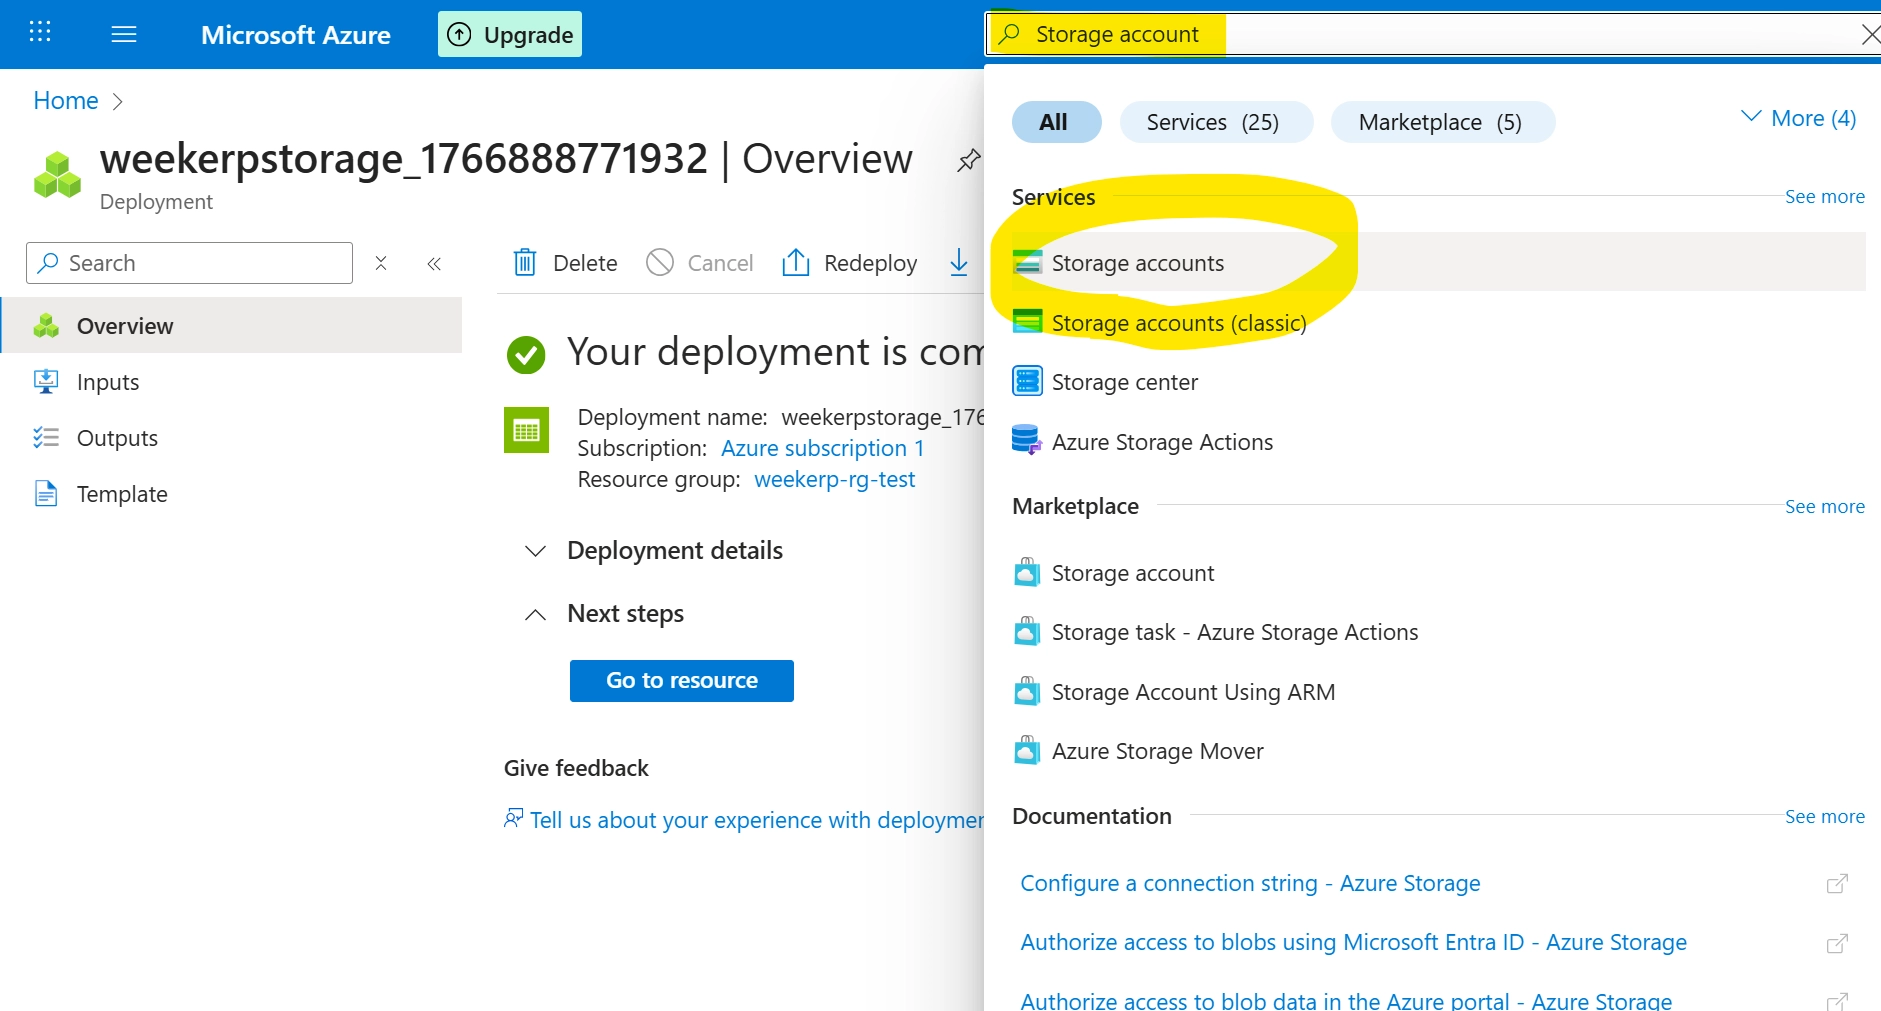
5. キーの発行:Storage accounts を検索してクリック
- Storage accounts を検索
- Storage accounts の検索結果をクリック
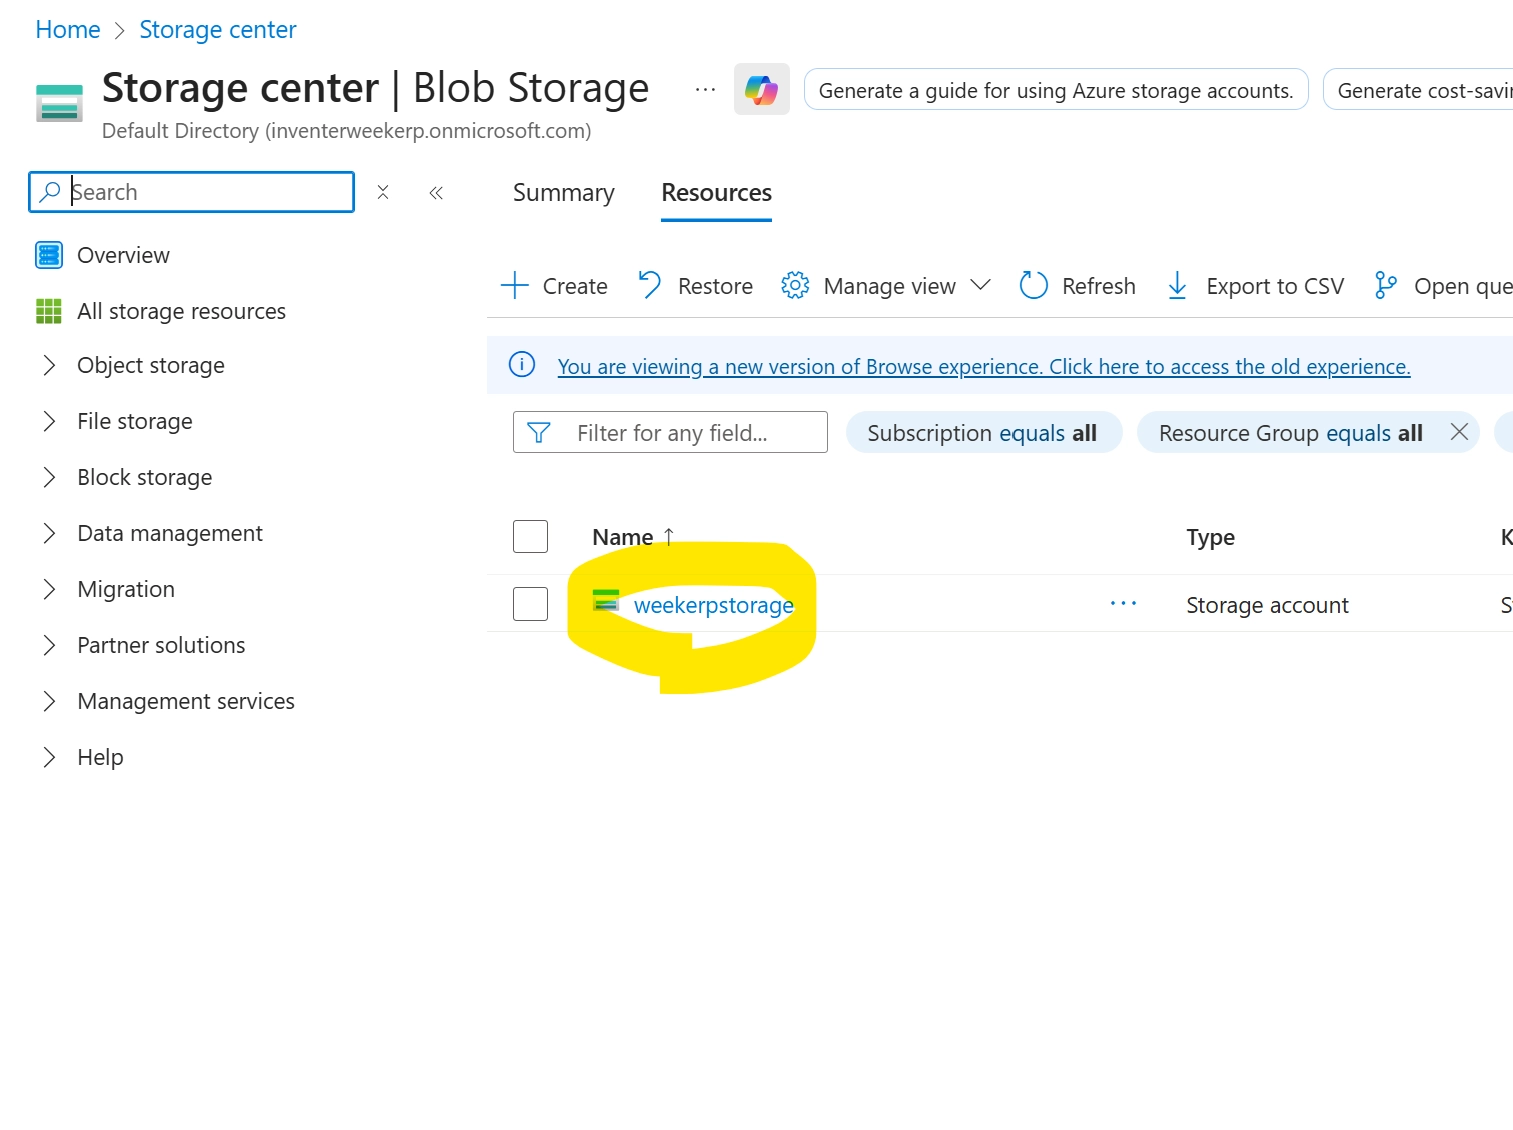
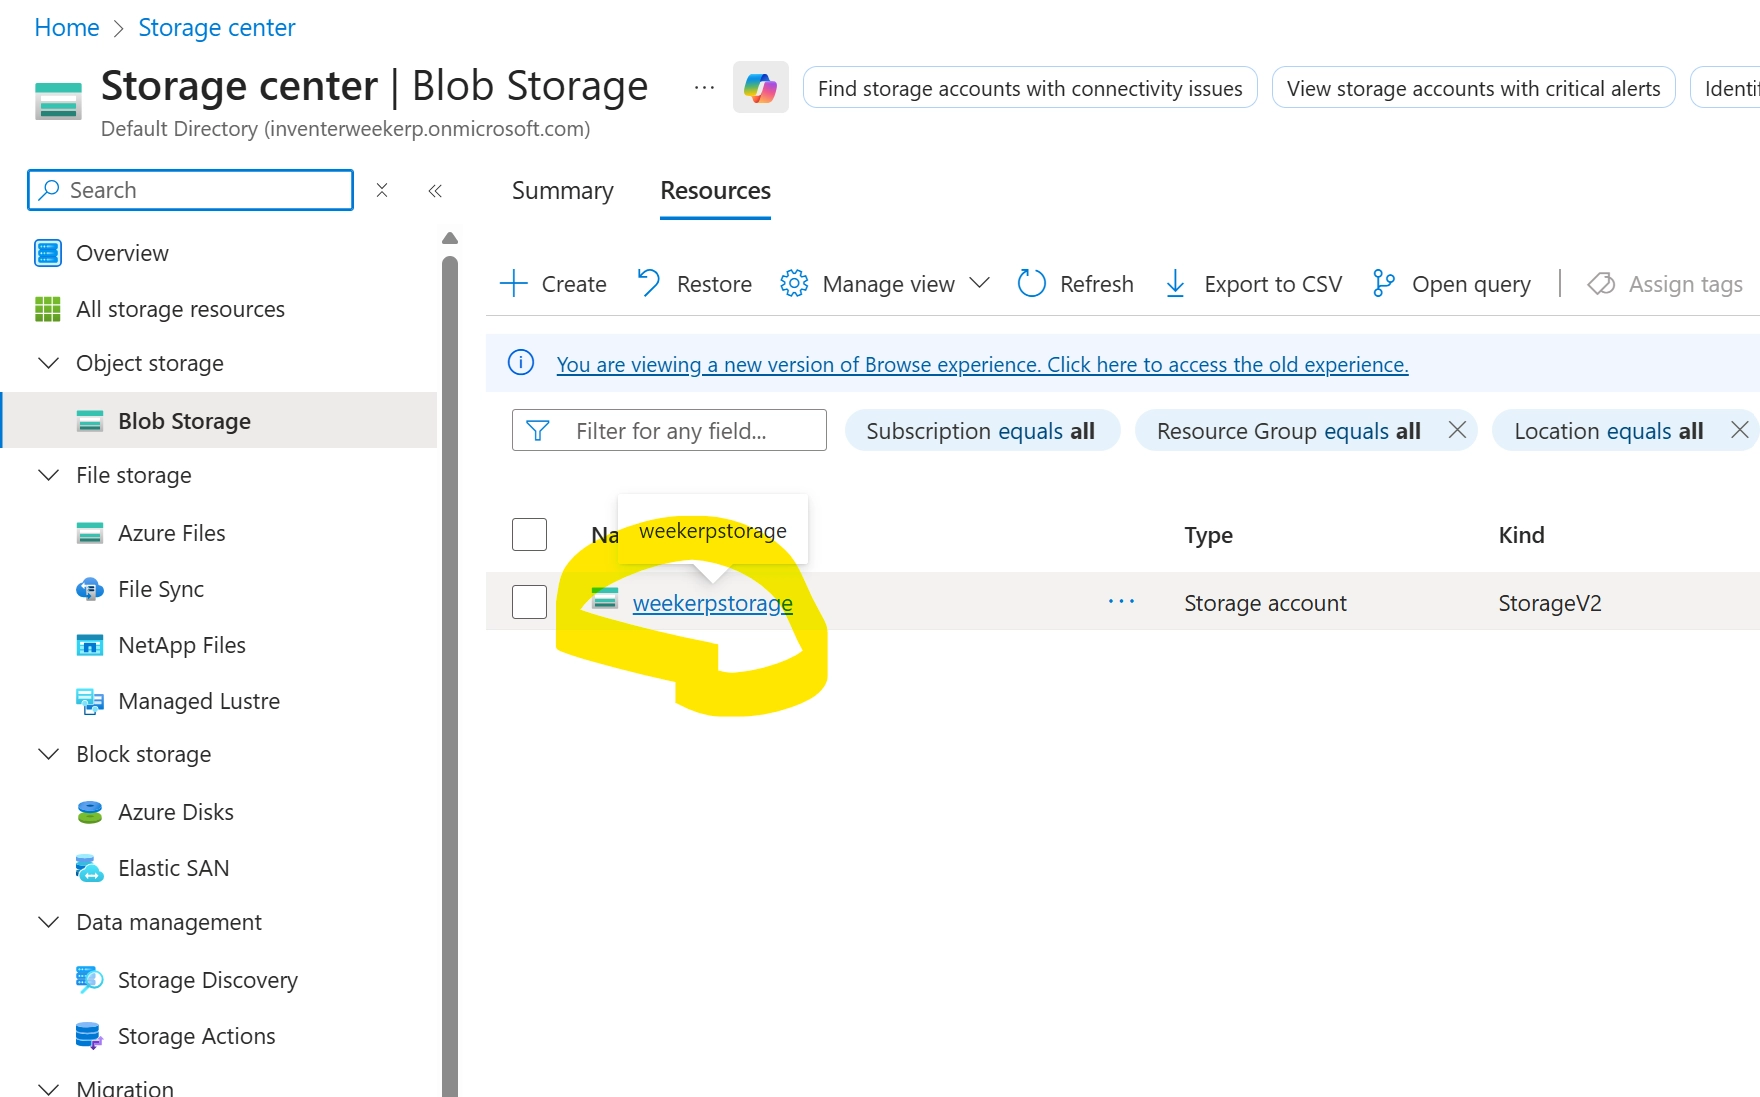
6. 作成した Storage account をクリック
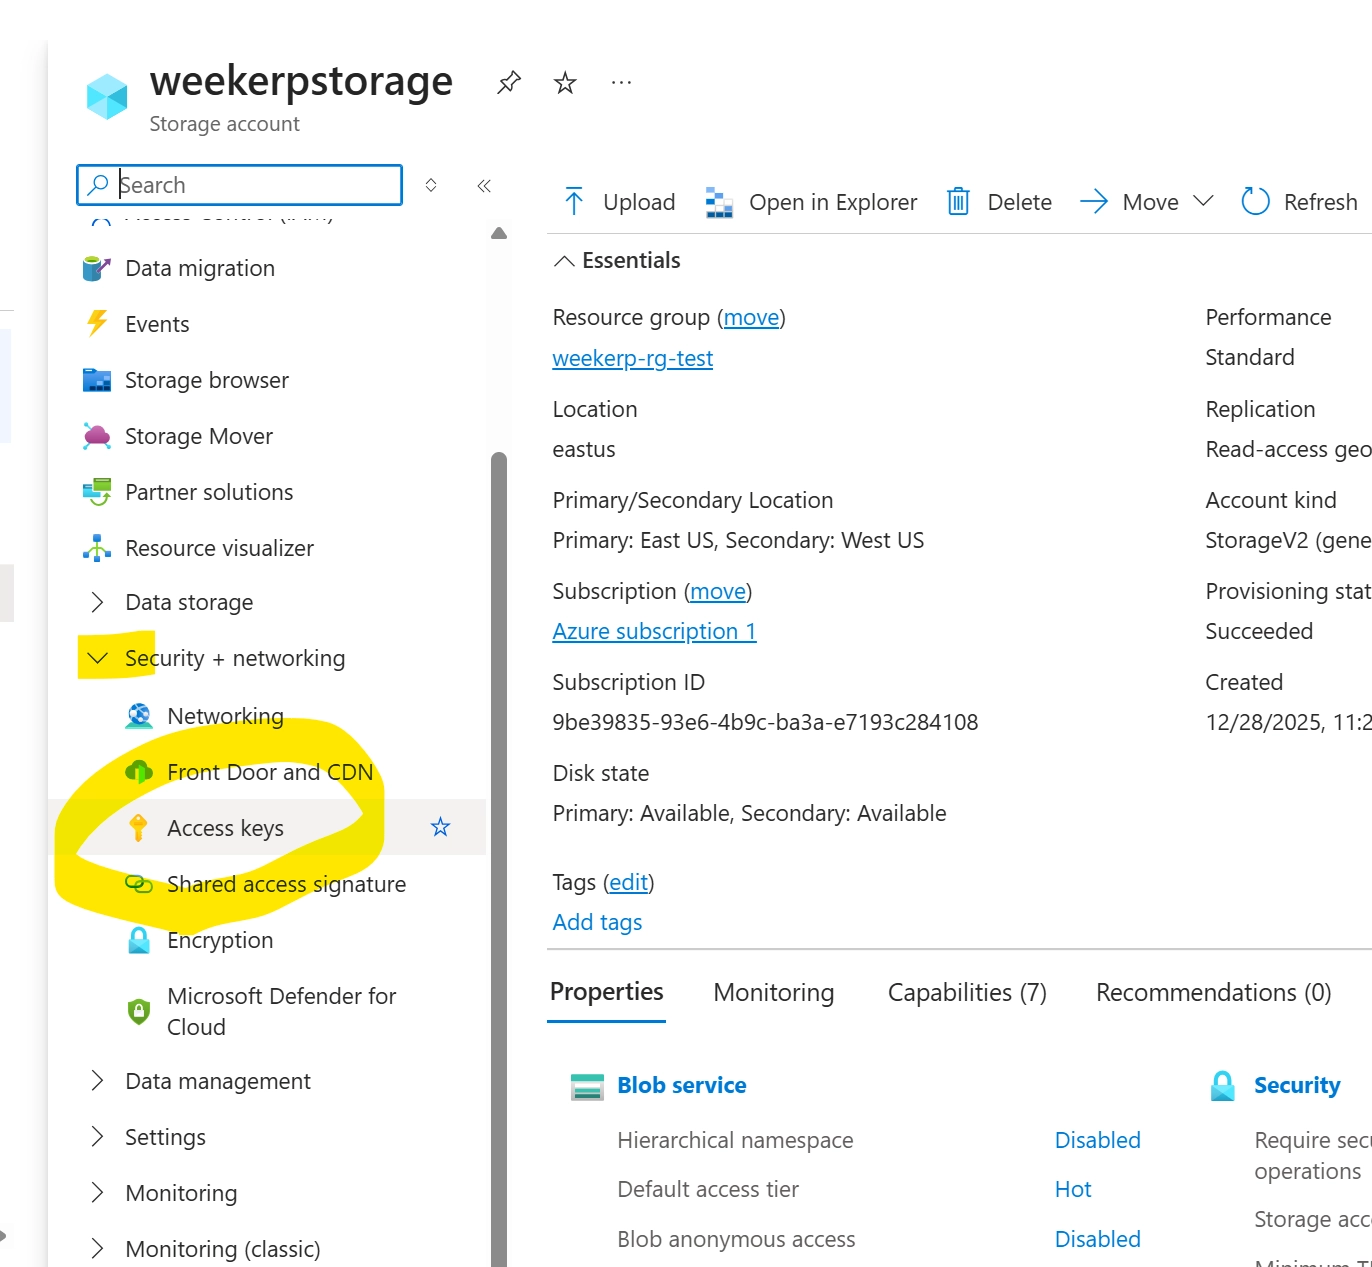
7. Access Key をクリック
- 左側のナビゲーションで Security + networking をクリック
- Access Keys をクリック
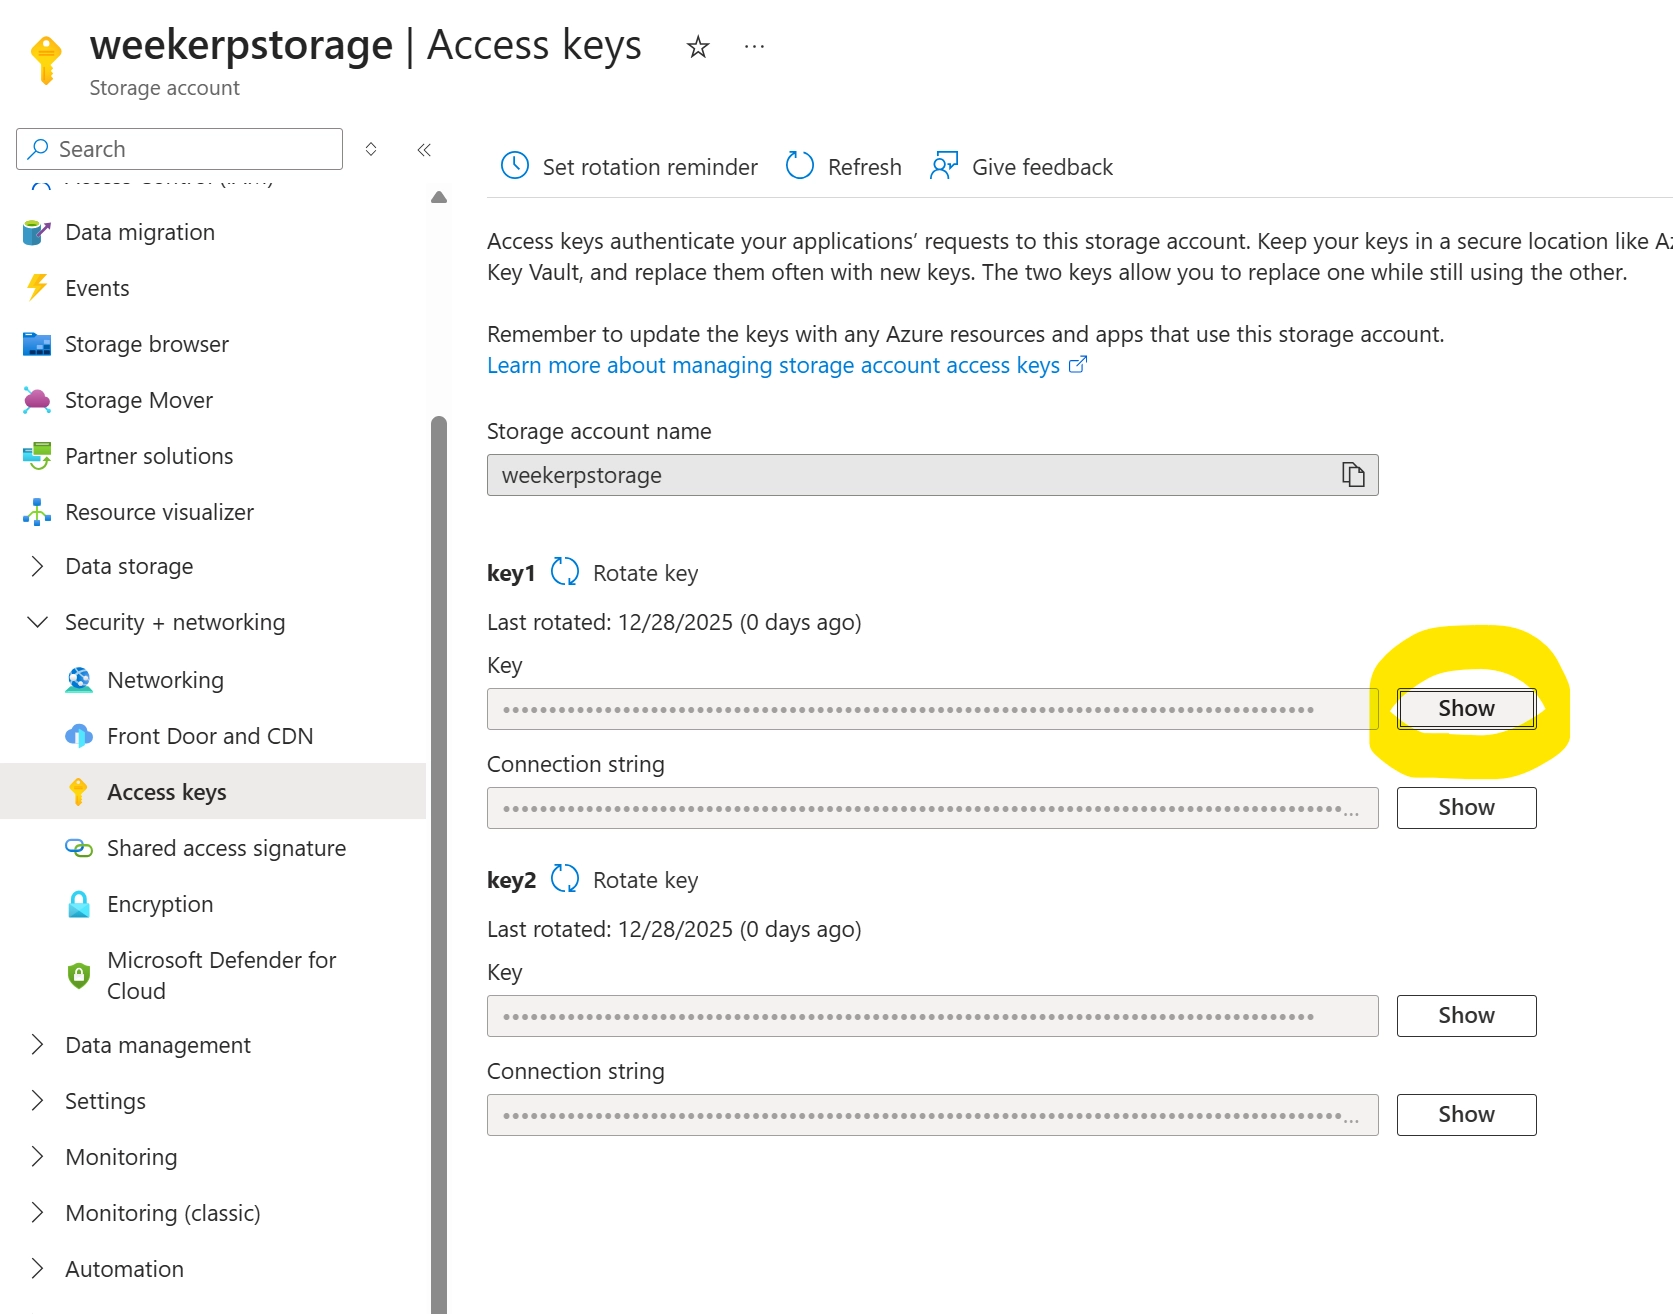
8. Access Key の確認
- key 1 を確認
- show ボタンをクリック
9. Access Key のコピー
- キーを確認
- クリップボードにコピー
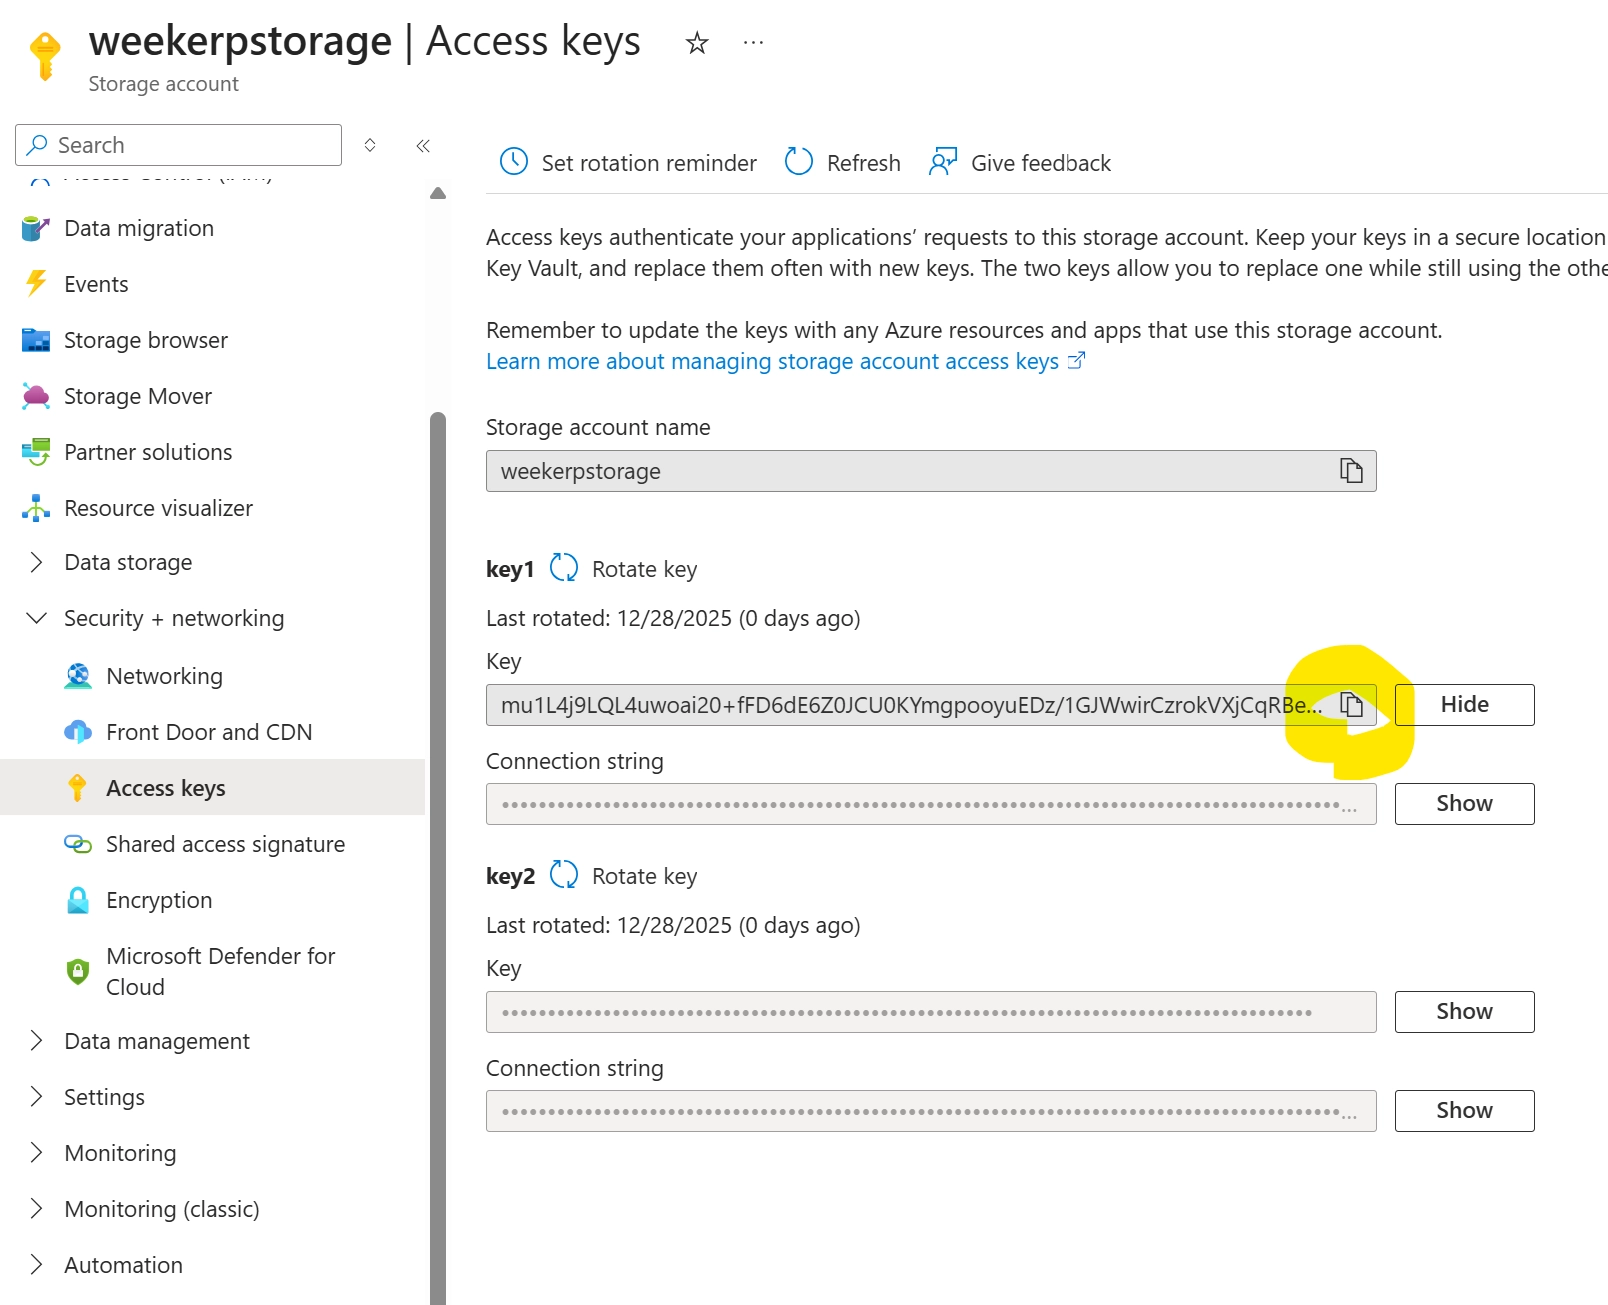
10. キーの確認
コピーしたキーは次のような形式で発行されます。
mu1L4j9LQL4uwoai20+fFD6dE6Z0JCU0KYmgpooyuEDz/1GJWwirCzrokVXjCqRBeFuoIPXsBgTH+AStC6O0qw==
11. Storage の作成:Azure 管理コンソールで「Storage accounts」を検索
12. Storage account を選択
13. Containers をクリック
- 左側のナビゲーションで Data Storage をクリック
- Containers をクリック
14. Add container をクリック
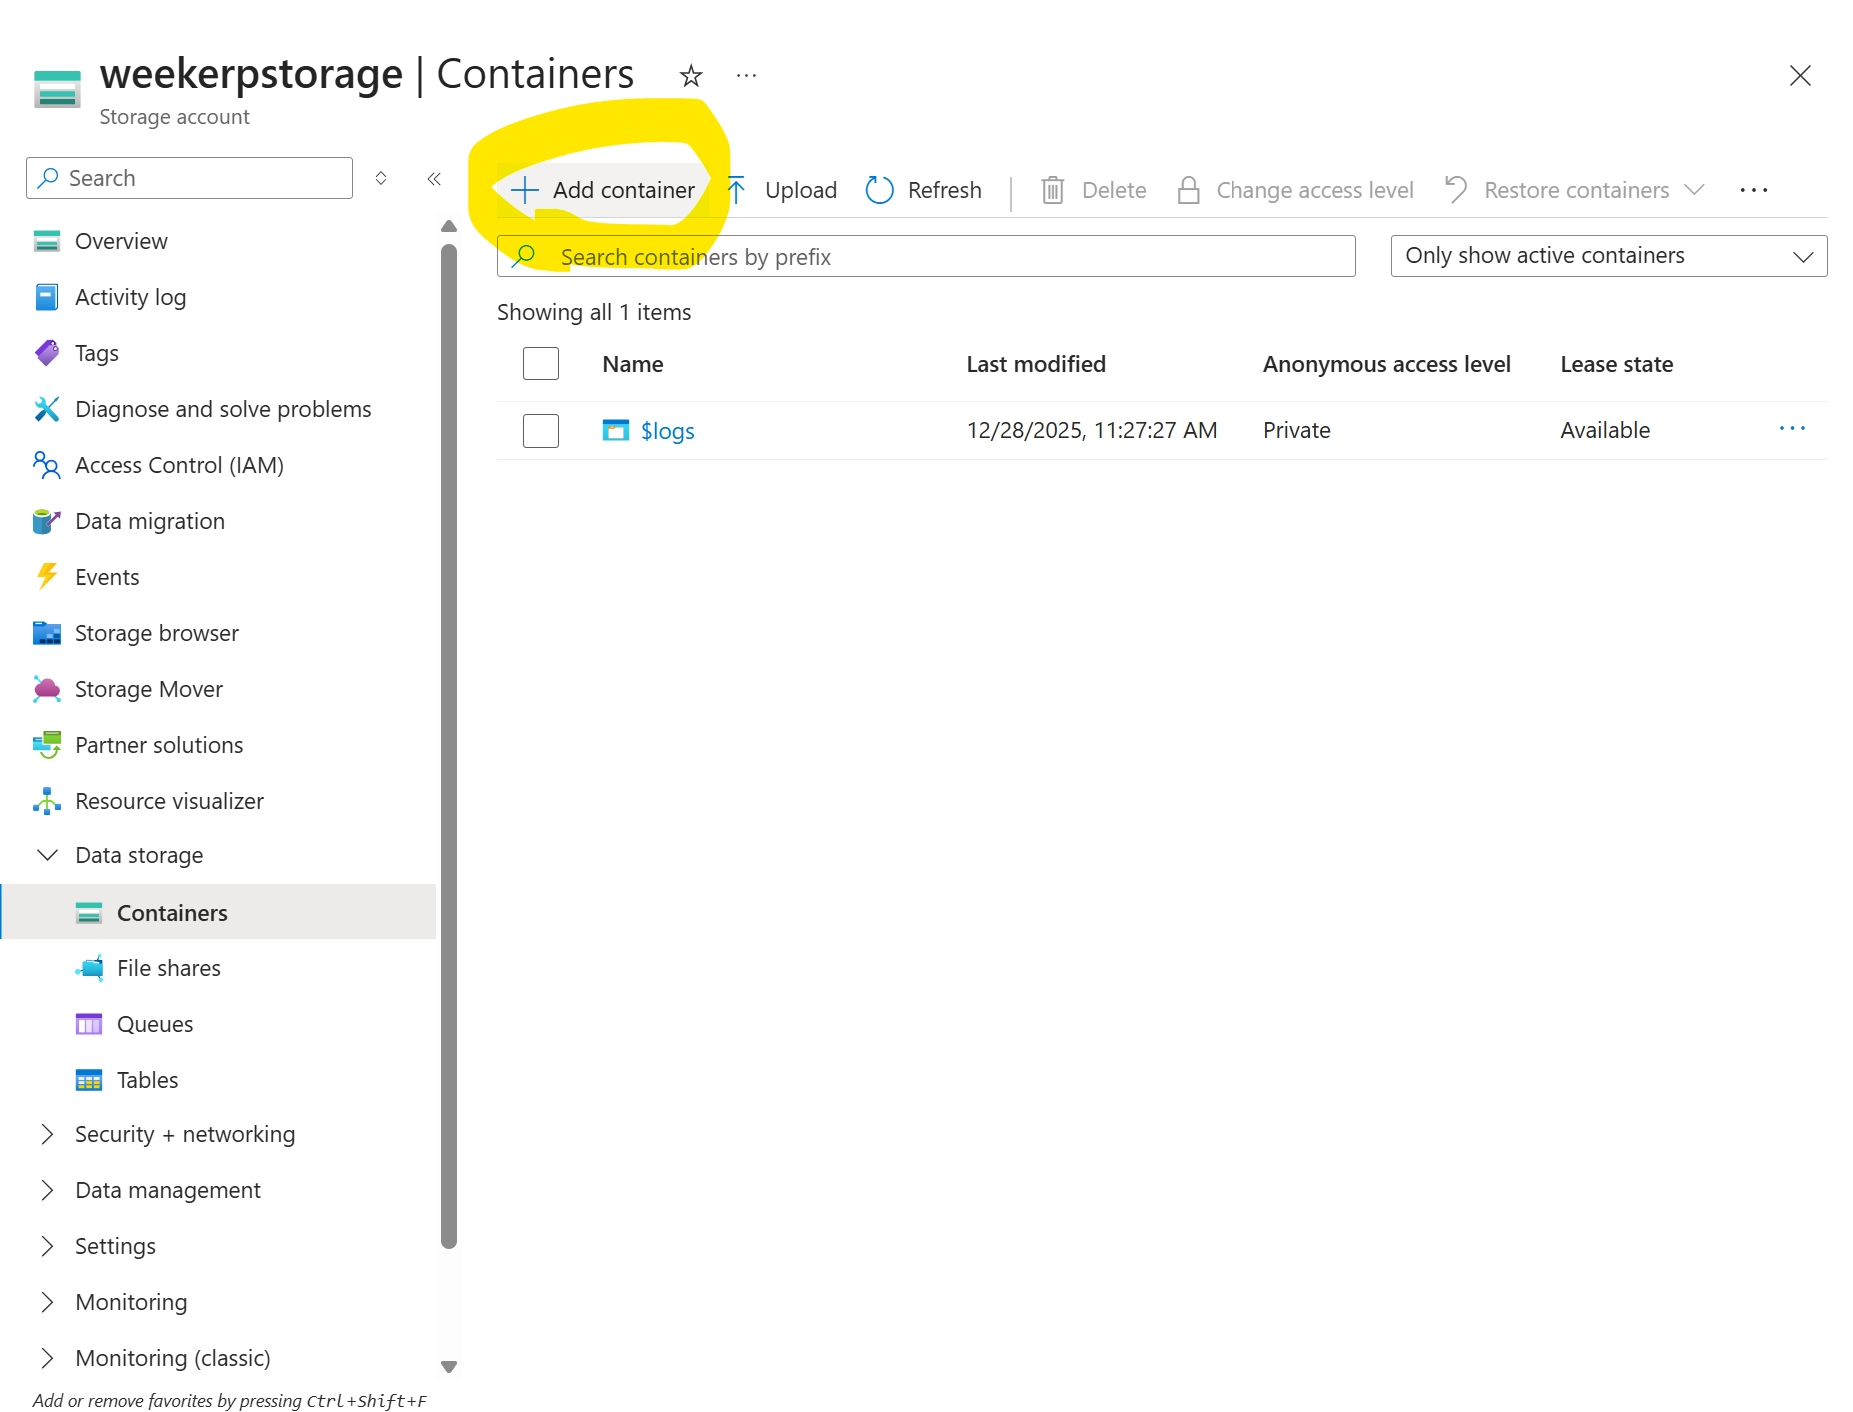
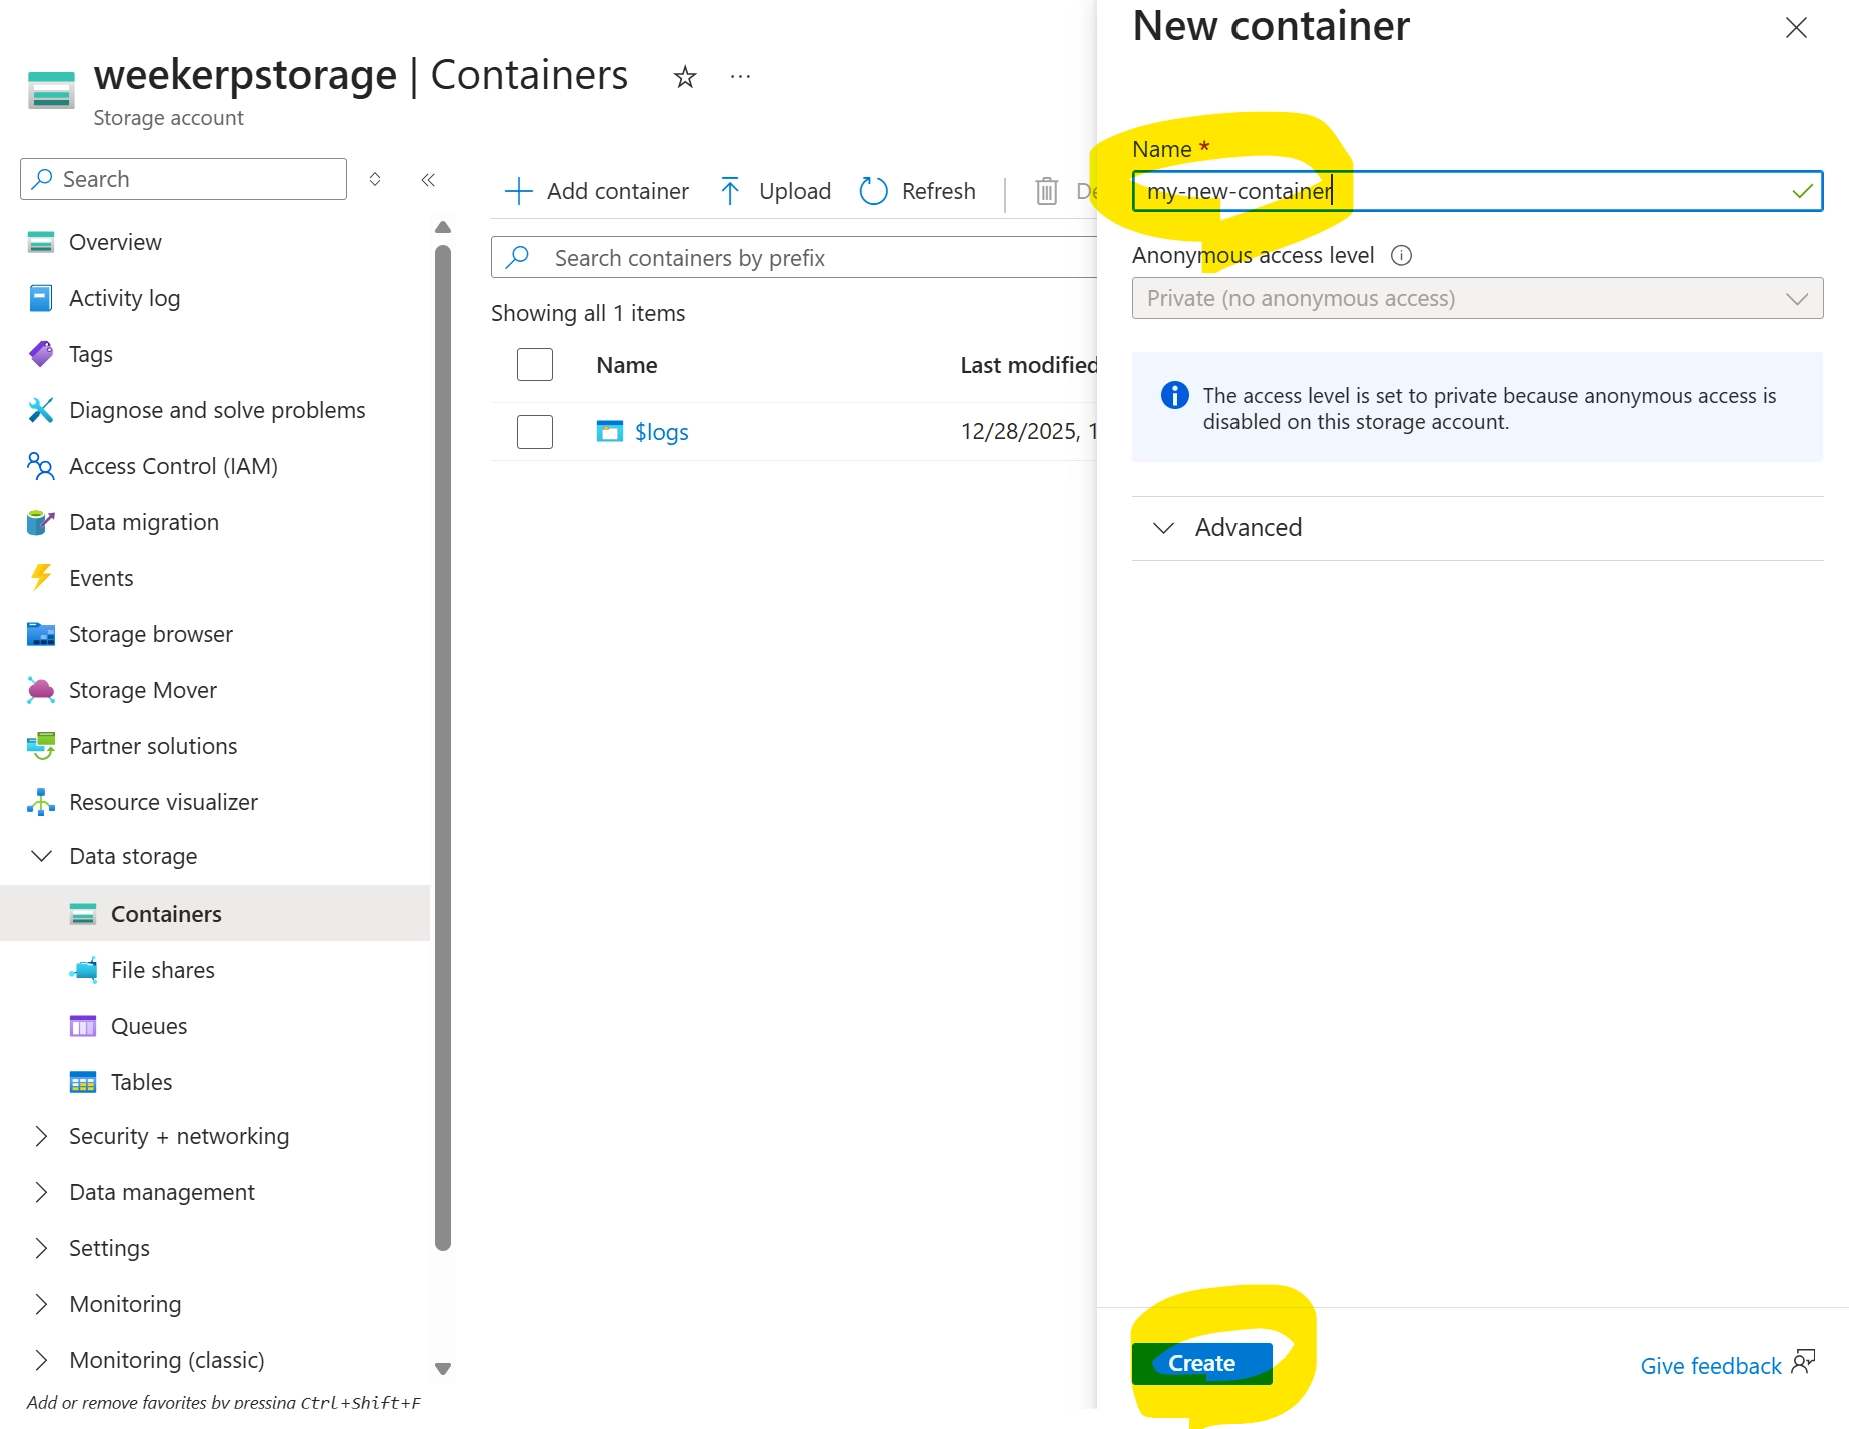
15. ストレージ名を入力して作成
- ストレージ名を入力
- 下部の create をクリック
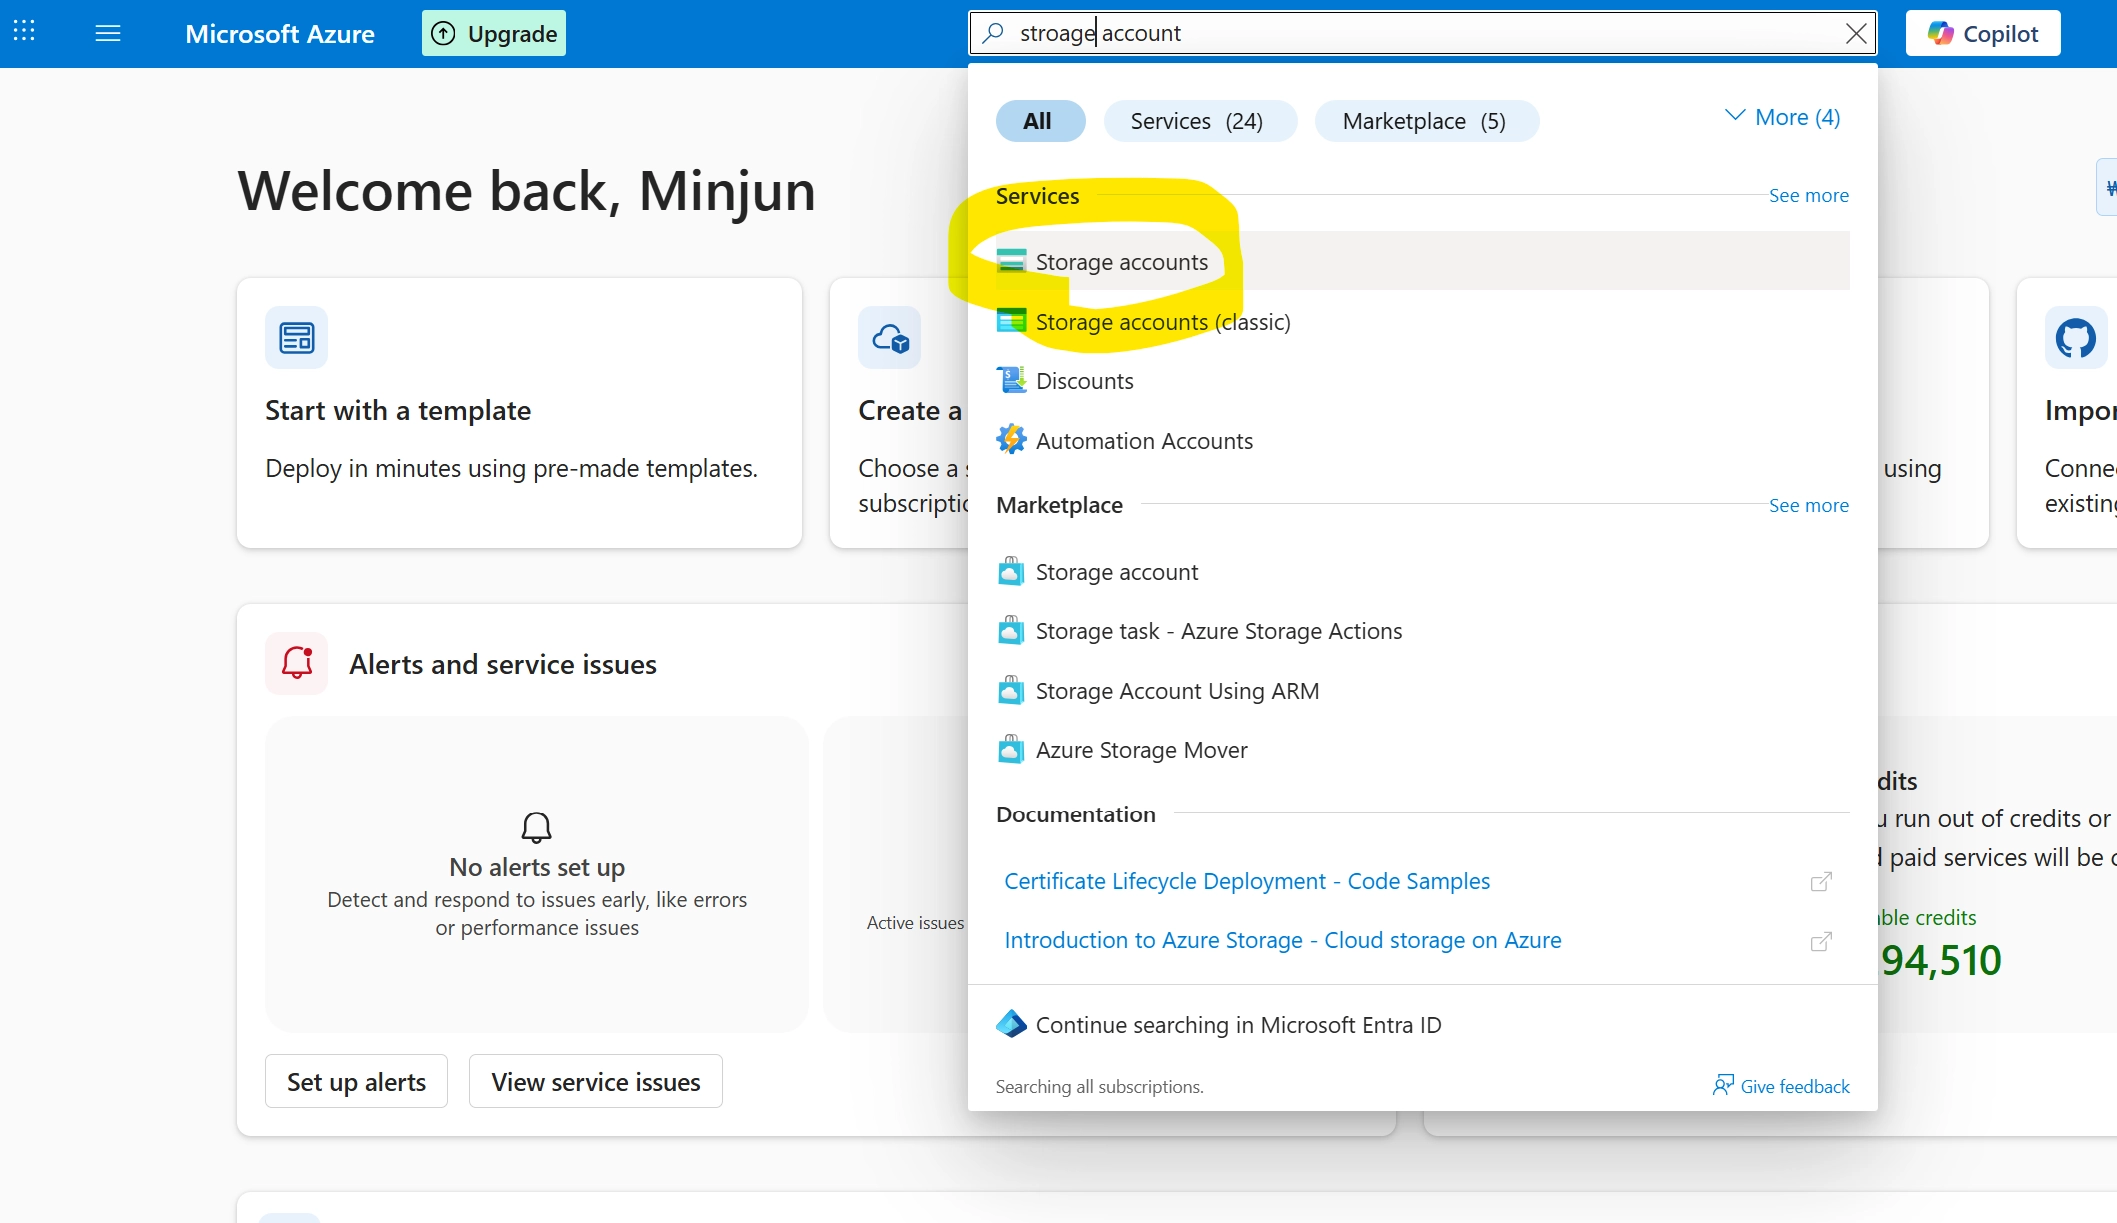
16. Storage 名の確認:Azure 管理コンソールで「Storage accounts」を検索
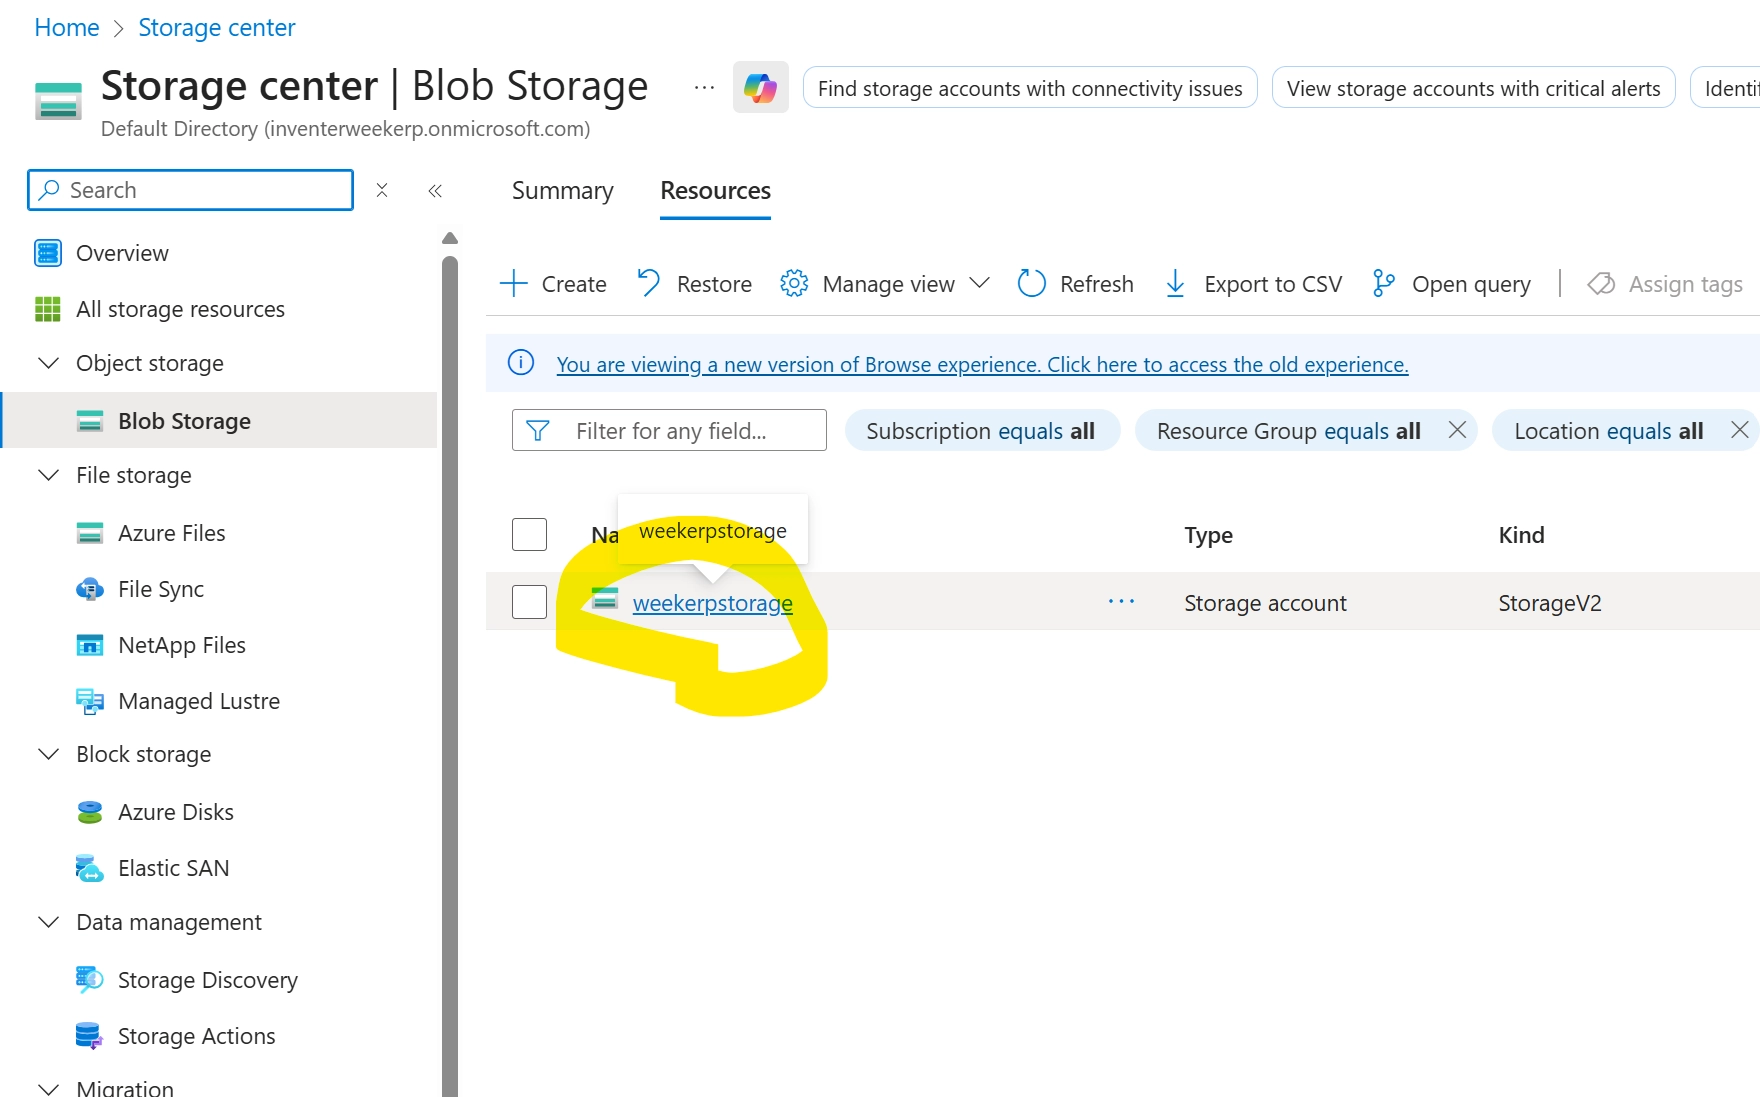
17. 接続したい「Storage Account」をクリック
18. Container をクリック
- 左側のナビゲーションで Data Storage をクリック
- Containers をクリック
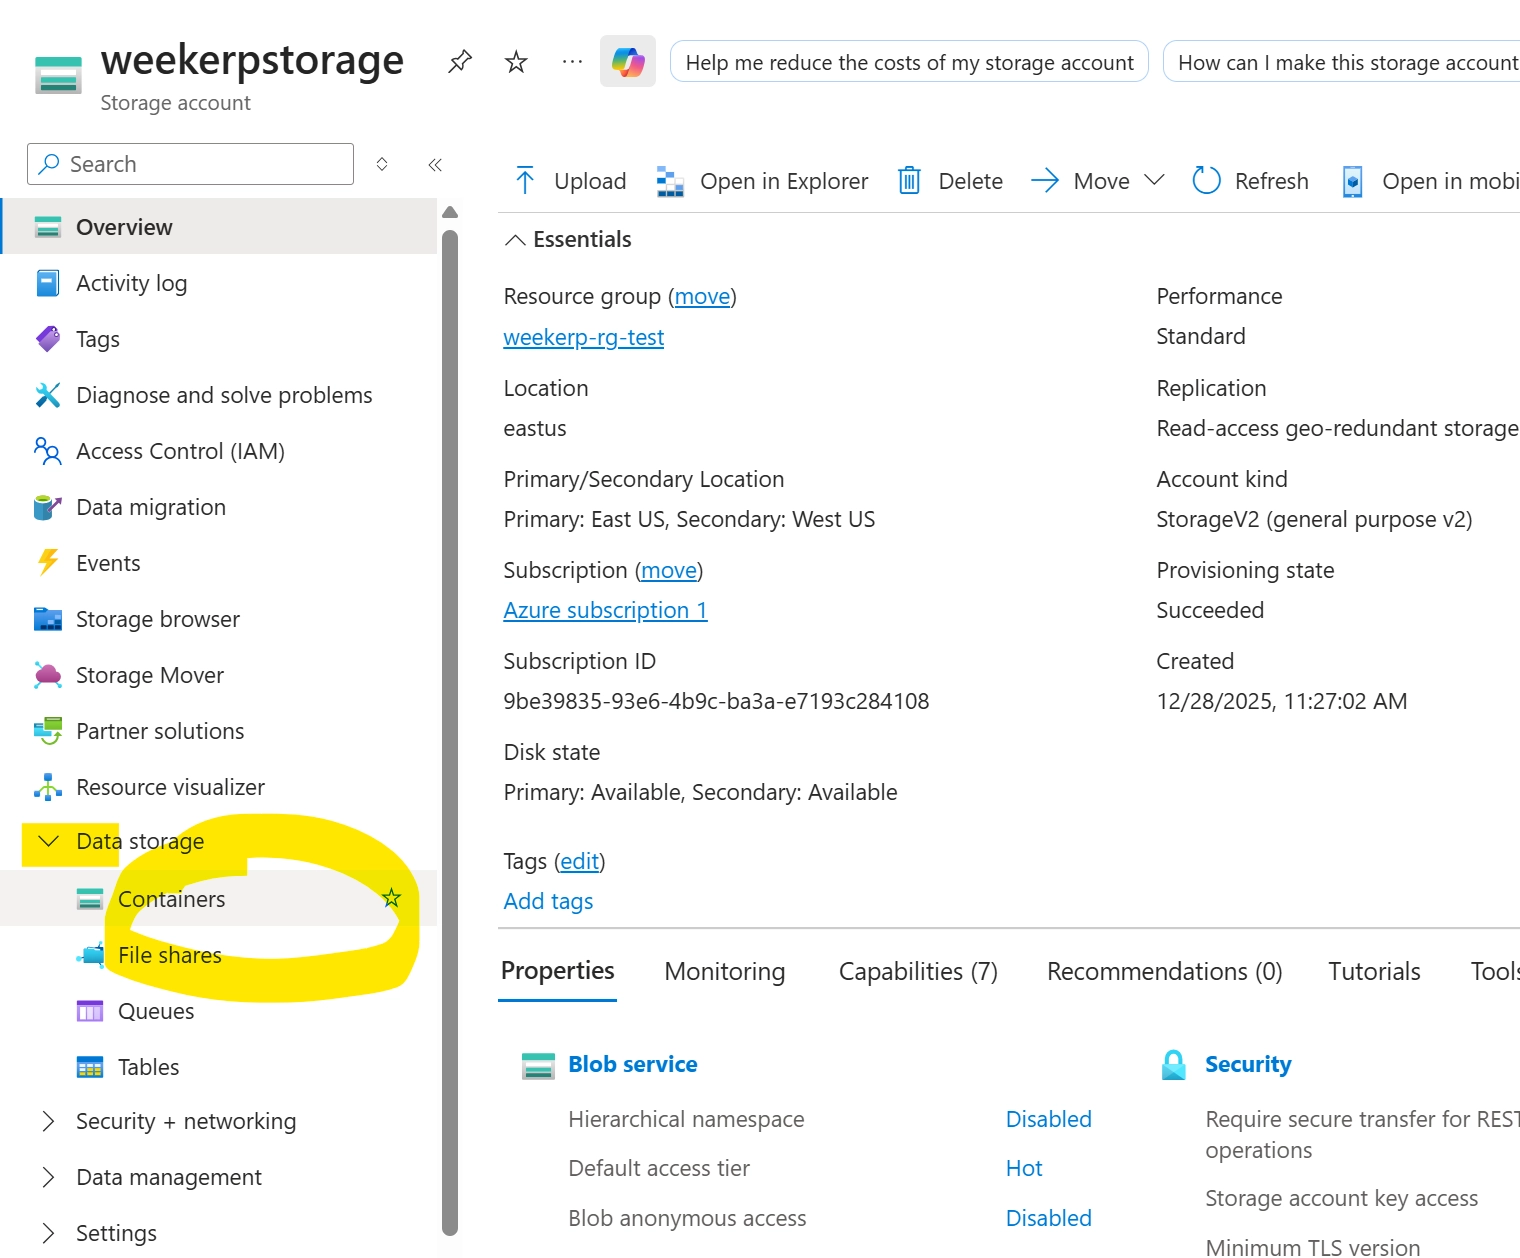
19. 接続したい Container 名を確認
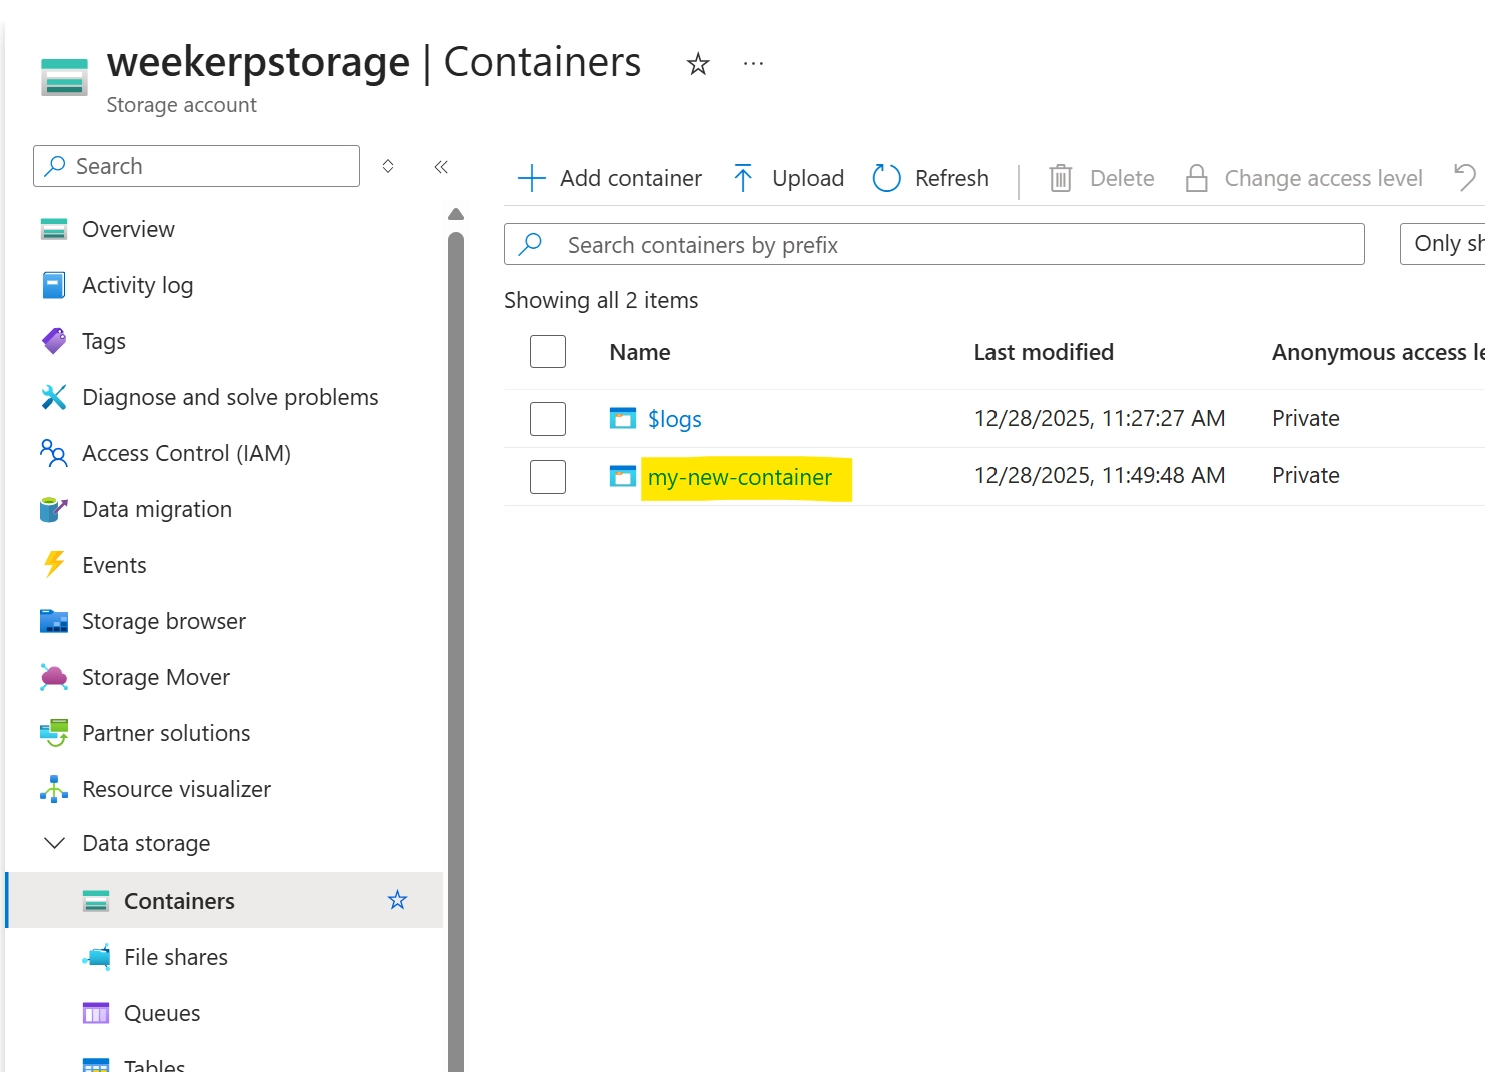
20. 次の情報を準備しておく必要があります。
- Account Name (Step #6, Step #17)
- Account Key : (Step #9)
- Container Name (Step #19)
21. Weekerp にアクセスし、右上の Add Source をクリック
- Weekerp にアクセス
- Source タブをクリックし
- Add Source をクリック
22. Microsoft Azure Storage を選択
23. 認証情報の入力
- Account Name を入力
- Account Key を入力
- Container Name を入力
- Next ボタンをクリック
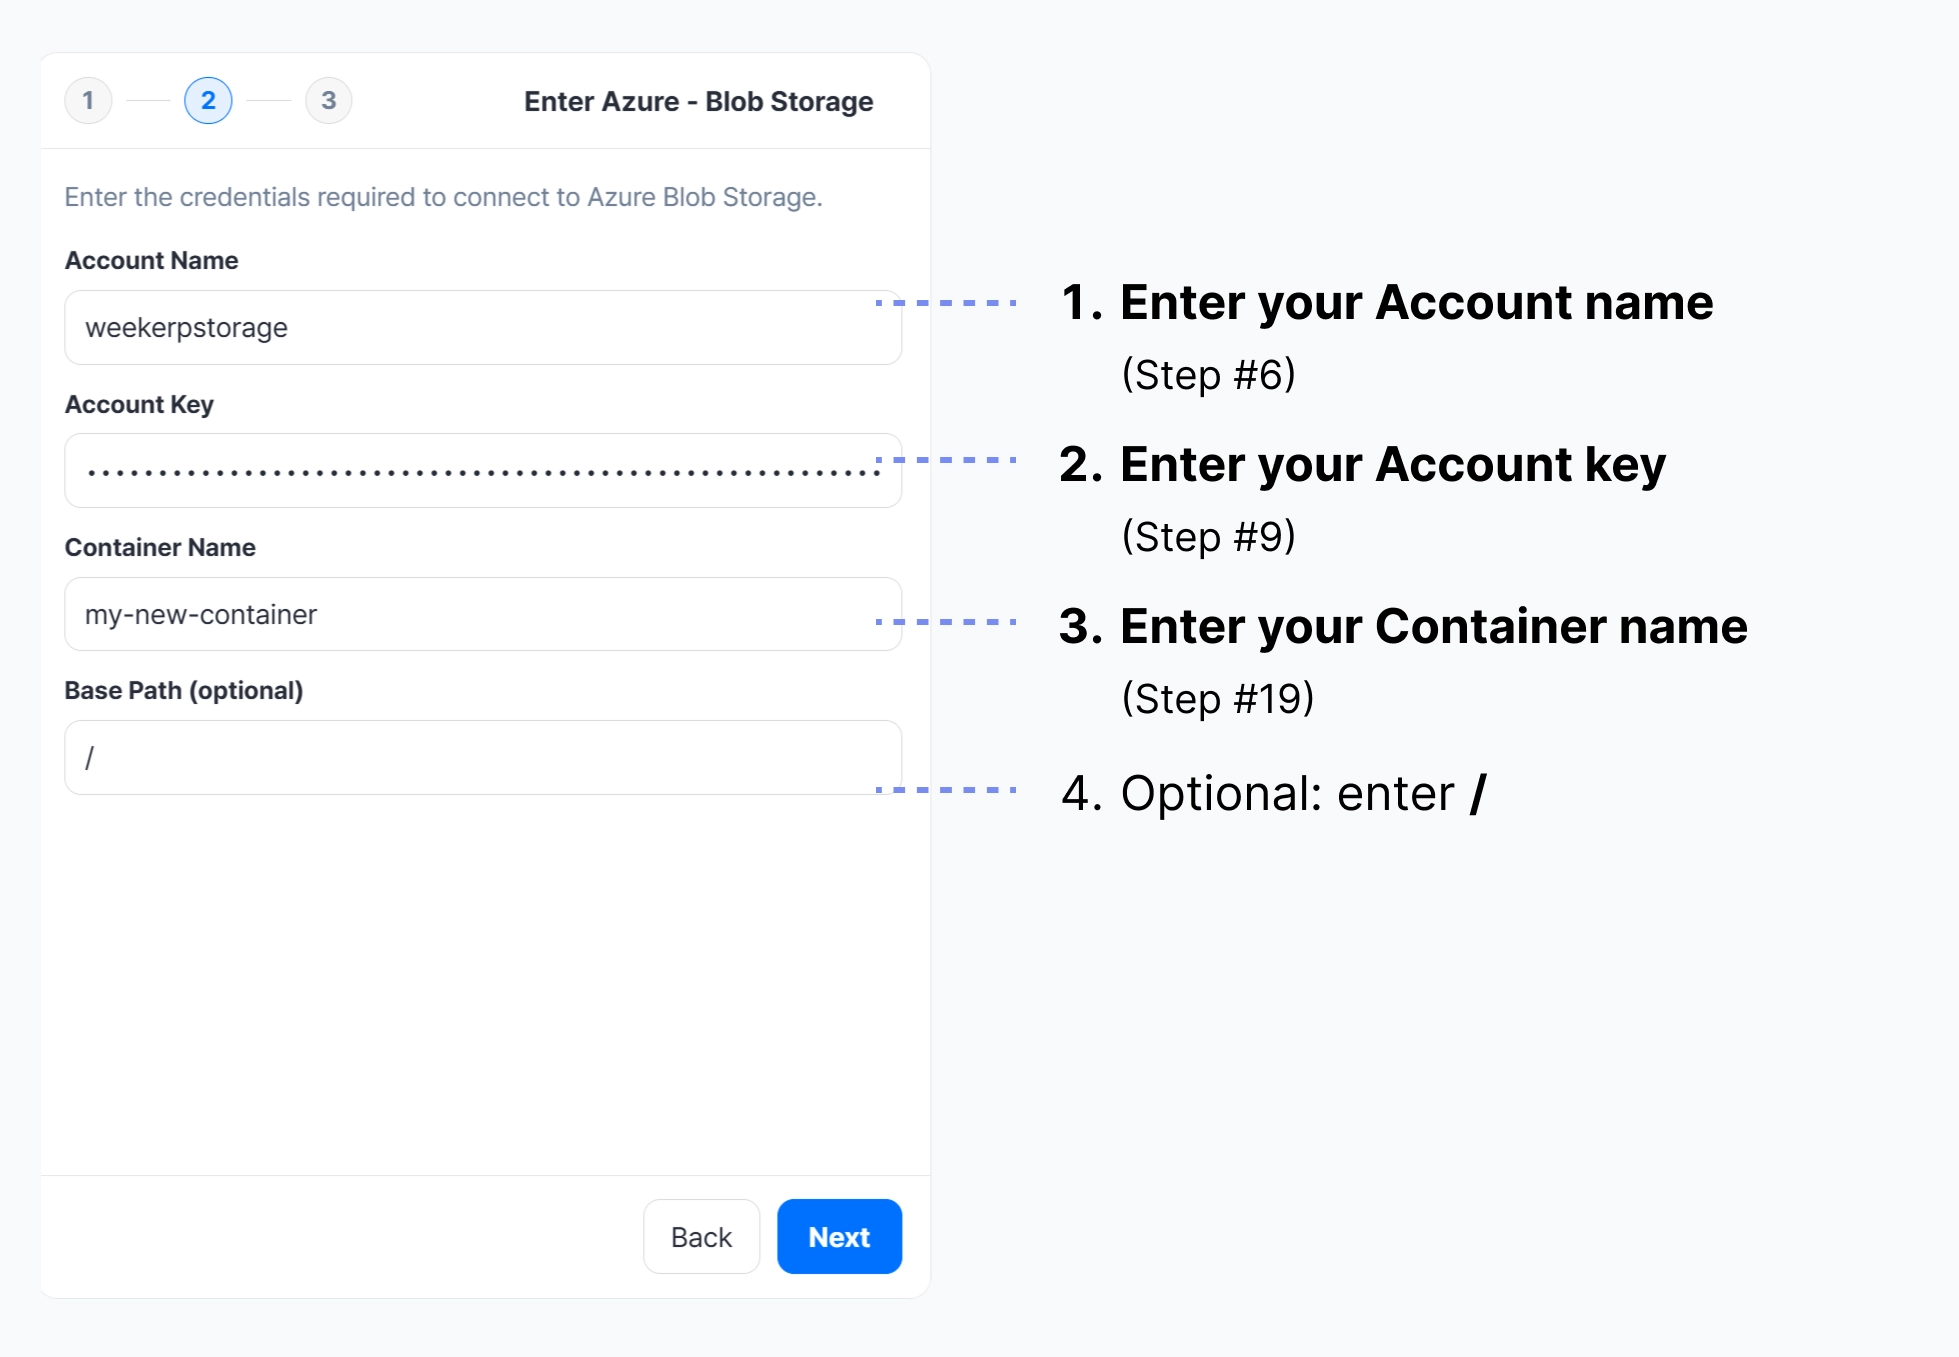
BasePath は、オリジンへのリクエストのルートディレクトリを設定します。
ファイルを次のように保管している場合、basePath は / または /assets に設定できます。
- /dog.jpg
- /assets/cat.png
リクエスト例
cdn.weekerp.com/image/{alias}/dog.jpg
オリジンへのリクエスト
- BasePath 設定あり:
https://static.example.com/assets/dog.jpg - BasePath 設定なし:
https://static.example.com/dog.jpg
詳しくは BasePath 設定をご覧ください。
24. ソースのエイリアス(alias)を入力
- 使用するエイリアスを入力
- エイリアスを作成
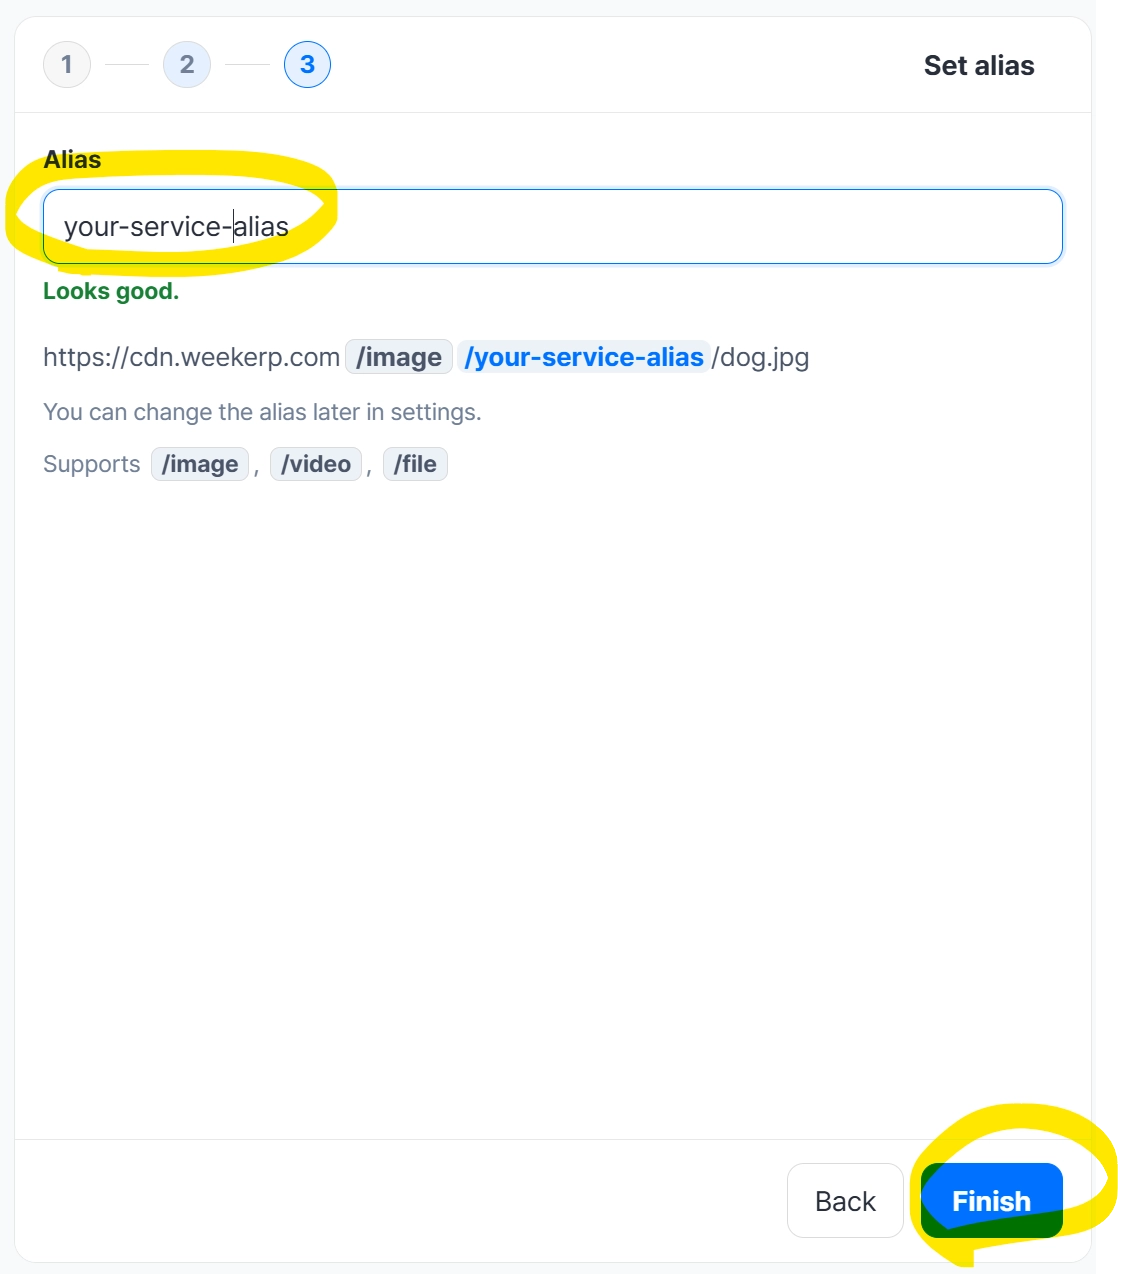
25. 作成したデータソースを確認
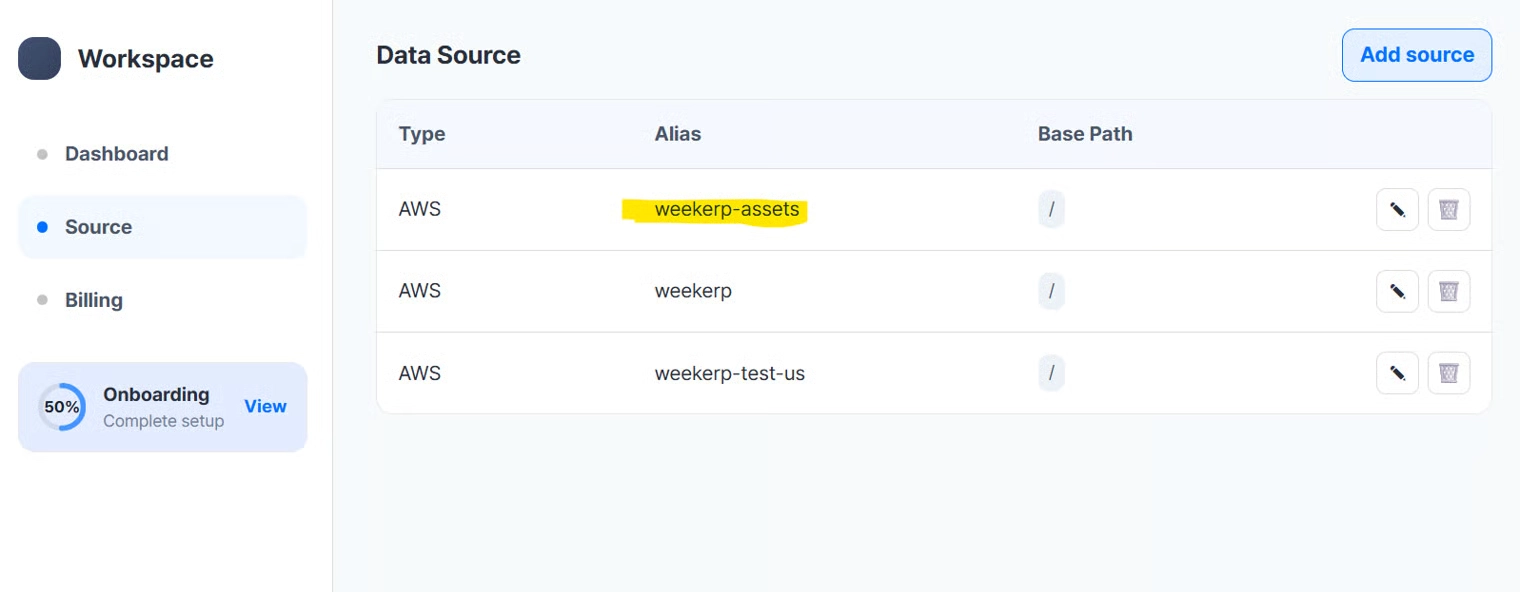
次のように使用してください。
cdn.weekerp.com/image/weekerp-assets/dog.jpg
cdn.weekerp.com/image/weekerp-assets/dog.jpg?ai=Rotate the image to the right
cdn.weekerp.com/video/weekerp-assets/test-video.mp4
すべての設定が完了しました。
通常、接続がすべてのグローバル環境に反映されるまで 5~10 分かかります。